Editing Automation Envelopes
Automation envelopes can be edited directly, using the mouse, as well as with external hardware controllers. The following section describes editing automation envelopes with the mouse. Refer to the Automation with Hardware Controllers section of the Control Link chapter for more on editing envelopes with external hardware controllers.
To edit an automation envelope, you first need to show automation by clicking on the Show Automation button at the top of the Track column or by choosing Expand from the Track contextual menu. A Track must also be selected in order for the automation envelope points to appear.
Arrow Tool
Editing an automation envelope with the Arrow tool lets you add new points to the envelope, move existing points, and select and delete existing points. Be sure to select the Arrow tool in the Arrange view before attempting the following processes.
Add a New Automation Point
To add a new point to an automation envelope using the Arrow tool, float the mouse above the envelope in the Track Lane so that the Hand cursor appears. Click-and-drag the envelope to create a new point and move it to your desired position.
Move an Automation Point
To move any point on an automation envelope, use the Arrow tool to click-and-hold any existing point on the envelope. While holding, moving the selected point vertically changes its parameter value, and moving the point horizontally changes its time position. Hold [Ctrl]/[Cmd] while dragging an automation point to lock the time (horizontal movement) or value (vertical movement), depending on the distance from the point.
Automation points can also be nudged left and right on the timeline by holding [Alt]/[Option] and using the left and right arrow keys. It is also possible to float the Arrow tool over an envelope point and then hold [Alt]/[Option] and scroll the mouse wheel up or down to increase or decrease the value of the point (that is, move it along the vertical axis).
To make very precise automation moves, hold down [Shift] while moving an automation point. This moves the point at a slower rate than normal as you move the mouse, enabling finer control.
When moving an automation point, notice the pop-up value indicator.

This displays the current parameter value. The range and the type of value depend on the parameter being automated and on the current time value displayed in the Timebase selected in the Arrange view.
[Right]/[Ctrl]-click on any automation point to bring up the contextual menu, where the point value and envelope color can be changed.
In Studio One Pro, you can drag an automation point as far beyond the position of other automation points as needed. Moving an automation point beyond other points on the envelope causes the other points to move as well. The other points being moved are restored to their original positions on the timeline if the point that caused them to be moved is moved back beyond their original positions.
Note that when Audio Events or Instrument Parts are moved, any underlying Track automation is moved along with the Events by default. To disengage this option, see the Studio One/Options/Advanced (macOS: Preferences/Advanced) menu and uncheck the Automation Follows Events option.
Change the Segment Curve
When you hover the cursor over an Automation segment between two points, a curve handle appears on the white line. Click-and-drag the handle up or down to shape the curve of that segment. For more precision control, [Right]-click the handle to access a contextual menu that will let you enter the desired curve value and type of your choice.

Delete an Automation Point
To delete an existing point on an automation envelope using the Arrow tool, first click on a point to select it. Then, press [Delete] on the keyboard to delete the point. Alternatively, [Right]/[Ctrl]-click on any automation point and select Delete from the pop-up menu to delete it.
Editing Multiple Points at Once
It is possible to simultaneously edit any number of points on an automation envelope. Using the Arrow tool, click in the Track Lane, away from any existing automation point, and then drag to draw a selection box around the points you want to edit. You can also hold [Alt]/[Option] and click in empty space, or directly on a point, to select all points on the envelope from that point in time forward.
With multiple points selected, click-and-drag, using the Arrow tool, on any of the selected points, in order to move them all. Moving multiple points vertically to adjust the parameter values adjusts each parameter value relative to the point being moved.
Paint Tool
Editing an automation envelope with the Paint tool allows you to draw many automation points with a single move of the mouse, effectively painting an envelope. However, a single click with the Paint tool adds a single point. The paint tool offers various automation editing options to fit a wide range of applications:
-
Freehand lets you automate effects in a freeform way. You can create automated shapes with or without the snap to grid function enabled.
-
With the Line tool enabled, it is easy to create precise and perfectly straight automation lines, be it horizontal, vertically ascending or vertically descending.
-
The Parabola tool can be used to create gradual ascending or descending automation curves. The intensity of the curve will depend on how much time there is between the starting and end points of the automation.
-
The Square, Triangle, Saw, and Sine tools make it easy to include classic synthesizer waveform shapes to your automation envelope.
You can choose from several figures when using the Paint tool, or you can use the Transform editor, as described in the following subsections. Be sure to Show Automation and select the Paint tool in the Arrange view before attempting the following processes.
Draw an Automation Envelope
To draw an automation envelope using the Paint tool, click-and-drag in the Track Lane. While you are drawing the envelope horizontally, points are added at different time increments based on the current Timebase. However, when the mouse button is released after drawing an envelope with the Paint tool, the drawn curves of the envelope are intelligently and accurately approximated to achieve the desired result with as few points as possible, which may or may not remove some unnecessary points from the envelope. If Snap is engaged in the Arrange view, the envelope points being drawn snap to the grid accordingly.
Drawing an envelope with the Paint tool over existing points on an automation envelope causes the existing points to be overwritten with the newly drawn points. These actions can be undone and redone.
Draw with Figures
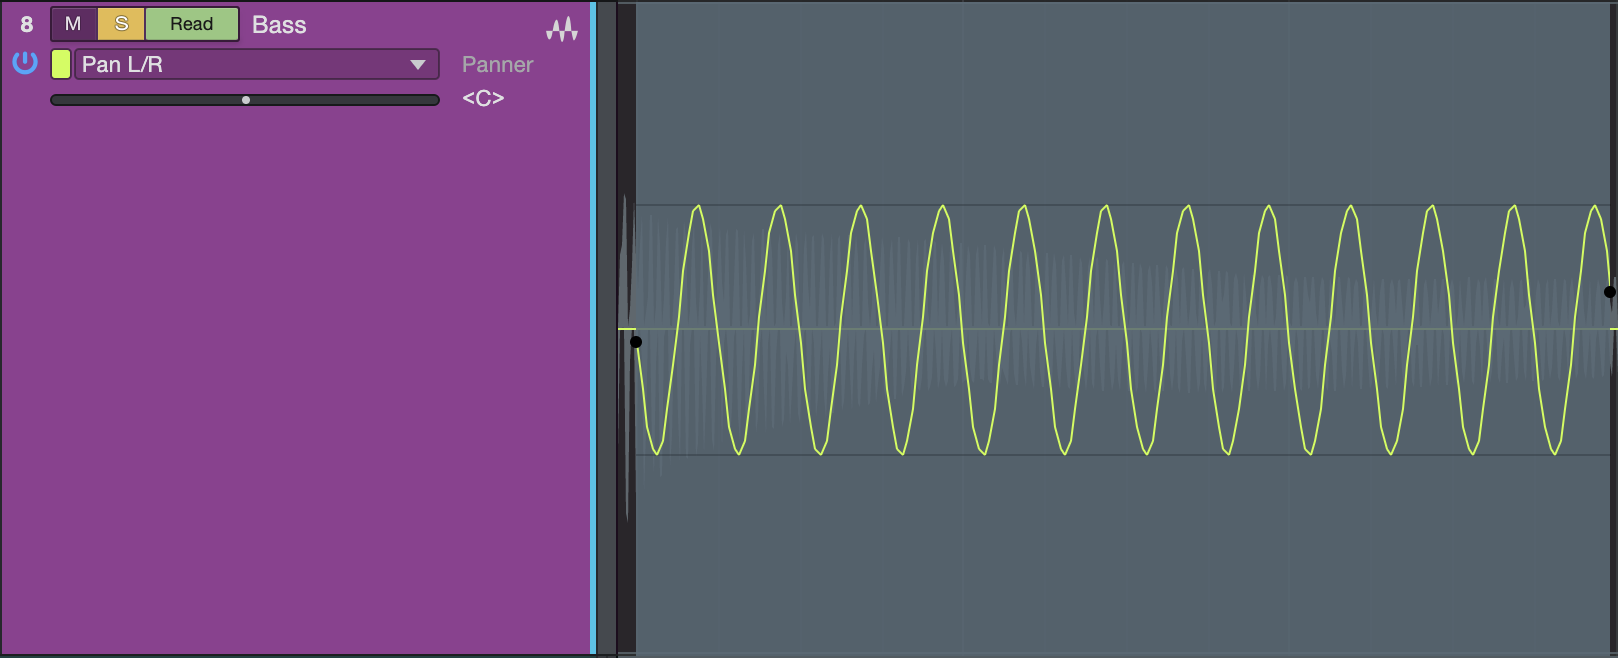
With your cursor over the Paint tool, scroll the mouse wheel to reveal several figure-drawing tools, including Freehand, Line, Parabola, Square, Triangle, Saw, and Sine waveform tools. With any of these tools selected, click-and-drag on any automation envelope to draw the desired envelope. When using the waveform tools, you can hold [Alt] to adjust the frequency of the waveform while dragging, or hold [Ctrl] to vary waveform phase (amplitude and polarity). Hold [Ctrl]/[Cmd]+[Alt] while dragging, to move the currently defined automation shape left or right along the timeline.
Transform Automation
![]()
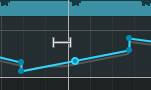
You can choose the Transform tool from the Paint tool drop-down list to alter existing automation, or add new automation. With the Transform tool selected, click-and-drag a selection box around any area of an automation envelope; then adjust the selection box by clicking-and-dragging one of eight handles (four sides and four corners) to scale the selected automation points.
As a shortcut, you can select a range of automation with the Range tool, and press [Alt]+[T] on the keyboard to automatically create a Transform selection over the chosen range.
Range Tool
You can use the Range tool to quickly trim select ranges of automation up or down in value. This can be done in two ways.
Trimming a Selected Range of Automation

If you want to trim a certain range of automation data up or down, select a range of automation with the Range tool. Then, hover the cursor in the upper half of the selected range, until the cursor changes into the Trim Tool. Click-and-drag up or down to trim the selected automation.
Trimming a Segment of Automation
If you want to trim a certain segment of automation (the span between two points) up or down, select the Range tool, and hover the cursor in the upper half of the automation lane, above the segment of your choice, until the cursor changes into the Trim Tool. Click-and-drag up or down to trim your chosen automation segment.
Duplicating Automation
Automation data can be copied and pasted by selecting a range of Automation curves and pressing [D] to Duplicate, or by pressing [CTRL+C] to copy and [CTRL+V] to paste. In a paste operation, the data will be pasted on the currently-selected track starting from the point of the play head. You can copy the automation parameters of an Insert Effect when copying the Effect by holding [Alt/Option] while dragging the Insert Effect to another track.
Remove Track Automation
To strip all automation from a Track, [Right]/[Ctrl]-click the track in the Arrange view, and select Remove Track Automation from the pop-up menu. Any previously created automation lanes remain, but all written automation data on the Track is purged.