Using the Marker Track
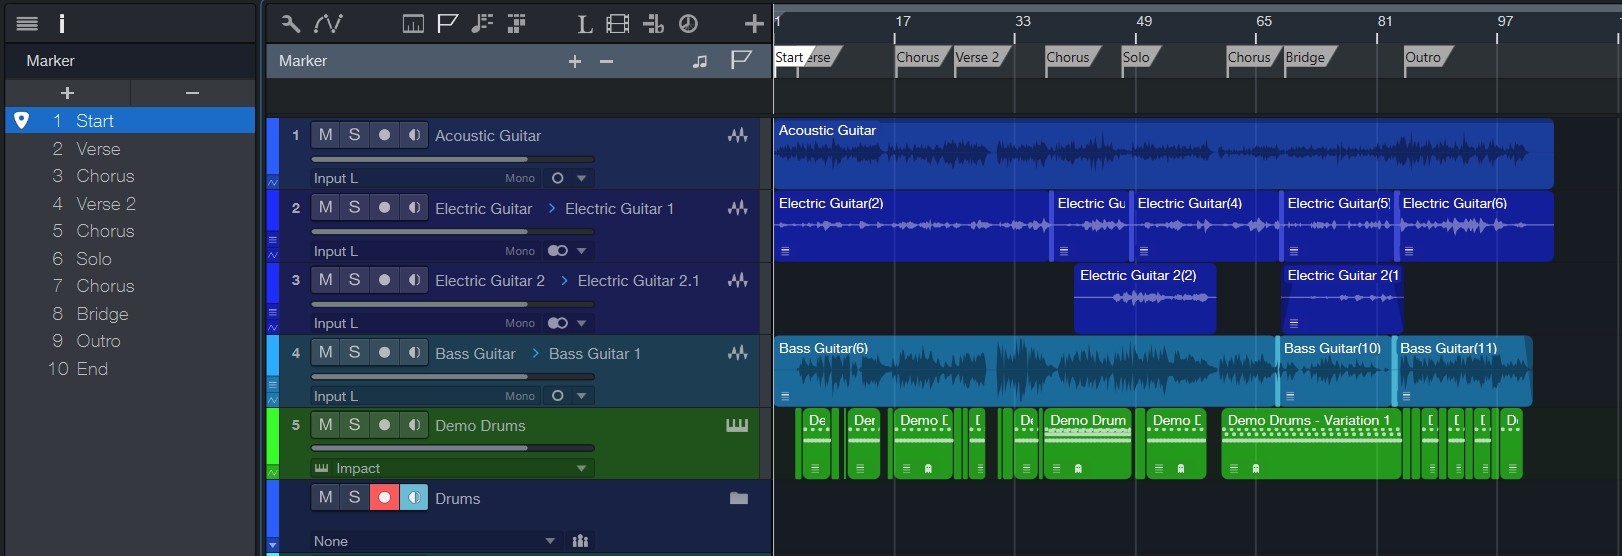
You’ll often want to navigate quickly to various areas of your Song during mixdown. In Studio One Pro the Marker Track is used to place Markers at desired places in the timeline, after which navigation to the Markers is easy. To open the Marker Track, click on the Marker Track button above the Track Column in the Arrange view.
Notice the Timebase button to the right of the Marker Track in the Track column. The musical-note icon on the Timebase button indicates that Markers will adhere to their position based on bars and beats, so if the tempo changes, the Markers move forward or backward in time in relation to their musical position.
If you click on the Timebase button, it switches to a clock icon, indicating that the Markers will adhere to their absolute position in time. If the tempo changes, the Markers do not move, as they are locked to an absolute time position in the timeline.
Inserting Markers
To insert a new Marker into the Marker Track, with playback running or stopped, click on the Add Marker button or press [Y] on the keyboard. Each new marker is numbered sequentially by default (1, 2, 3…). To insert a named Marker, press [Shift]+[Y], enter a name in the pop-up window, and click [OK], or press [Enter]. To rename a Marker, double-click on it in the Marker Track, type in a new name, and then press [Enter] on the keyboard. Note that, for clarity, the Start and End markers cannot be renamed.
Marker Track Inspector
Open the Inspector by clicking the [i] button above the Track column, or by pressing [F4] on the keyboard. This opens a window on the left side that shows a list of existing Markers.
A locator icon shows the current location, and always highlights the Marker that was passed most recently. Click the area to the left of the Marker name to move the playback cursor to that location. Double-click the Marker to rename it.
The plus icon at the top of the Inspector can be used to create a new Marker at the current position, which allows you to enter a name right away. If there is already a Marker at the current position a new Marker is not added.
Markers can be deleted using the minus sign. Hold [Shift] to select more than one Marker for deletion.
At the bottom of the Inspector is a window that shows the Marker Start time and a Stop At Marker check box. Click-and-drag the Start time numbers to adjust the Marker position.
[Right]/[Ctrl]-click any Marker for quick access to the Create Arranger Sections and Stop At Marker features.
Navigating Markers
You can quickly jump the playback cursor between Markers in the Marker Track. Click on the Previous Marker button in the Transport, or press [Shift]+[B] on the keyboard, to jump to the previous Marker. Click on the Next Marker button in the Transport, or press [Shift]+[N] on the keyboard, to jump to the next Marker.
Jumping between Markers during playback enables quick comparisons between sections of your Song. To jump to a specific marker, hold [Ctrl]+[Alt]/[Option]+[M] and enter the Marker number in the Recall Marker window. You can also jump to up to seven different Markers from the Transport/Goto Marker menu.
Song Start and End Markers
When a new Song is created, you can specify a Song Length. The default length is 5 minutes or 151 bars at the default 120 bpm tempo. At the beginning and end of the specified region, Song Start and End Markers are automatically placed in the Marker Track. These Markers can be used to define the timeline region to be exported in the Export Mixdown and Export Stems functions in the Song menu, and they are used by default in the Update Mastering File process.
Right click the End Marker to assign the “Stop at Marker” feature. Playback will stop when the play head reaches the End Marker.

Cut, Copy, Paste and Delete Markers
You can use standard Cut, Copy, Paste and Delete commands to distribute and manage your Markers. To cut or copy a Marker, select it by clicking its name flag, and either press [Ctrl]/[Cmd]+[C] to copy or [Ctrl]/[Cmd]+[X] to cut, or [Right]/[Ctrl]-click the Marker to open the pop-up menu and choose Cut or Copy. To paste a Marker, place the cursor at the desired location and press [Ctrl]/[Cmd]+[V]. To delete a Marker, select it and press the Delete Selected Markers button in the control area of the Marker Track. Alternately, you can delete a Marker by [Right]/[Ctrl]-click its name flag and choose Delete from the pop-up menu, or by selecting the Marker and pressing [Delete] on your keyboard.
You can also access these commands in the Edit menu.
If you have cut a Marker and wish to return it to its original position (and have since done other operations that would make using Undo impractical), press [Ctrl]/[Cmd]+[Shift]+[V] or select Paste at Original Position in the Edit menu.
Stop Playback with Markers
Markers can optionally stop playback when reached by the playback cursor. To engage this option for any Marker, [Right]/[Ctrl]-click on a Marker and engage the Stop at Marker option, or select a Marker and engage the same option in the Inspector. Note that this cannot be enabled for the End Marker.
Create Arranger Sections from Markers
There's a quick way to populate the Arranger Track with sections while working with Markers. Simply [Right]/[Ctrl]-click on a Marker and select the Create Arranger Sections from Markers option, and the Markers are instantly translated into Arranger sections.