Mixing in Spatial Audio
Surround and Dolby Atmos both employ robust panners to support spatial audio. To change a Channel’s Panner, right-click on the Channel’s Panner Micro View and choose the desired format from the drop-down menu.
Note that when converting a mono or stereo channel to an Object, Studio One Pro conveniently preserves the current pan position.
Bed and Objects
Channels in a Dolby Atmos mix are defined as either a Bed or Objects. To change a Channel’s type from a Bed to an Object, make sure it’s routed directly to the Main Output Channel, where it will be processed by the Dolby Atmos Renderer. Then, select “Spatial Object Panner” from the Channel’s Panner Micro View menu.
Surround Panner
The Surround Panner is responsible for positioning your Channels in a Surround setup or a Dolby Atmos bed. The top half of the panner displays the horizontal speaker configuration and signal positioning. The bottom half displays the vertical. The human head graphic in the center represents the position of a person listening to your music. We’ll call it “The Listener.”
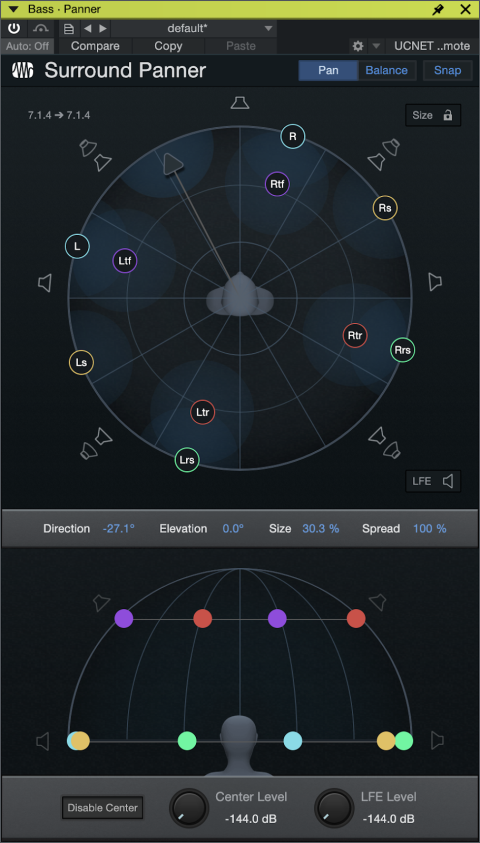
At the top left of the Surround Panner, you’ll find the current upmix/downmix information. The number on the left is that of the channel’s speaker format; the right is that of the Dolby Atmos bed. In this example, a 7.1.2 .WAV file is being panned into a matching 7.1.2 bed, but the formats are not required to match.
On the top half of the Surround Panner, Click and drag the arrowhead left or right to position the primary signal source. Click and drag the arrowhead toward or away from The Listener’s head to affect the signal’s size. Size can be locked using the lock icon on the top right; hold [Alt/Opt] to lock the current direction. Click the Snap button on the top right to toggle snapping the Direction to its nearest speaker.
Speaker channels are represented in the Surround Panner via labeled bubble icons.The number of bubbles you see will be dependent upon the Channel configuration; two bubbles for stereo and up to 14 bubbles for 9.1.6. Click and drag the bubbles to affect the signal’s spread. You can click any of the bubbles on the outside of the circle to toggle a mute function, removing them from the output of the selected Channel.
Speaker outputs are represented by speaker icons. Click any of them to mute, or [Opt/Alt] click to mute all speakers. A note on LFE muting: When the input configuration doesn't have a LFE channel but the output does, LFE send mix routing is muted by default. It can be toggled with the LFE button on the button right.
The bottom half of the Surround Panner will only be available if your Output Format includes height speakers. Click and drag the bubbles to control the Elevation.
The bottom of the Surround Panner hosts three other options:
- Disable Center to disable the Center speaker output
- Center Level to adjust the overall level of the Center speaker
- LFE Level to directly control the amount of signal sent to the Low-Frequency Effect output.
Direction, Elevation, Size, and Spread values can all be entered manually by double-clicking on their respective values.
Note that setting the Elevation value to 100% doesn't exclusively pan the signal to top speakers only.
Changing the Channel format (from Stereo to 5.1 or similar) will re-load the Default preset for the Surround Panner, and new Channels will also be loaded with the Default preset.
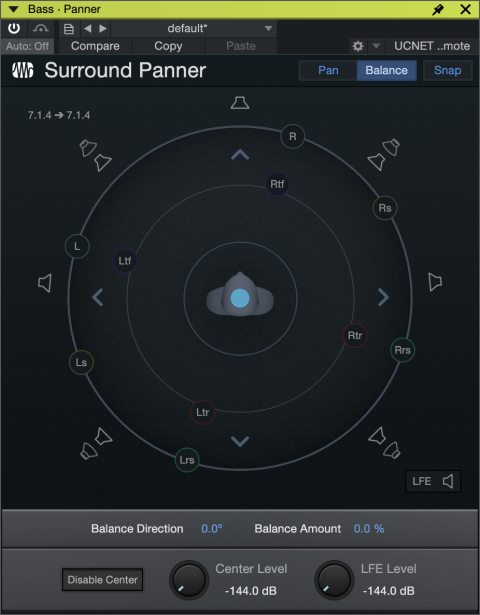
Balance View
The Surround Panner’s Balance View provides additional control over Balance Amount and Direction and can be used to shift the combined source signal horizontally in any direction. To access it, right-click the Channel Panner and select Balance View, or click the Balance button on the top right of the Surround Panner.
Click and drag the blue bubble to move it to the desired position around The Listener. Activate Snap and drag the bubble to the outermost perimeter of the display to snap it to a single speaker.
Spatial Object Panner (Dolby Atmos)
The Spatial Object Panner is used to position the currently-selected Channel’s sound in 3D space. The top half of the Object Panner depicts the position of the Object on the X and Y axes, the bottom half depicts position of the Object on the Z and X axes.
Click and drag the Object bubble to move it to the desired location in 3D space. All axes are independently automatable. Bubble colors match the colors assigned in The Console.
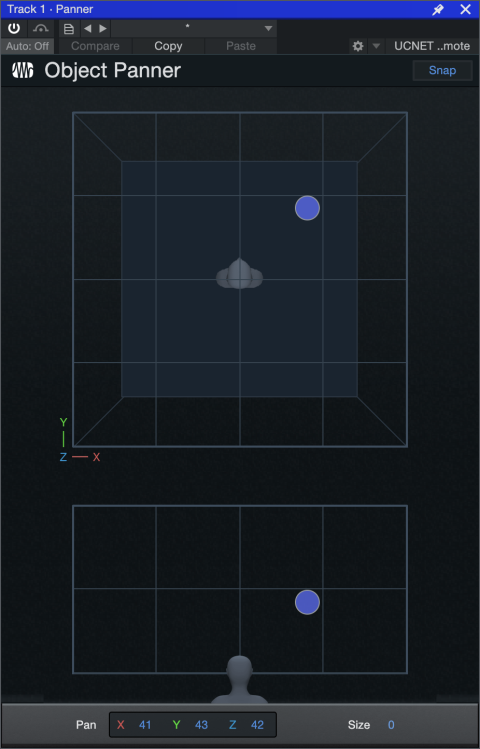
Click the Snap button on the top right to auto-snap the Object to the nearest speaker. X,Y, Z, and Size values can all be entered manually by double-clicking on their respective values.
Third-party Panners
Studio One Pro also supports third-party panner plug-ins. If you’ve got any installed, they will appear in the Channel panner Micro View’s right-click menu. Please note that some third-party effects may display here that are not suitable for this purpose.
Sends in Spatial Audio
Sends can take advantage of Spatial Audio panning. Click on the send panner in the Micro View to access a full-sized panner for editing. Note that “Lock Pan to Channel” is only available if the source Channel format matches the target Channel format.
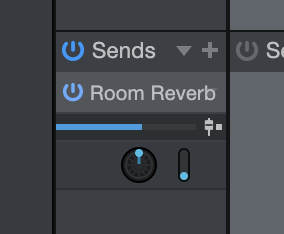
Any time a Send is routed to a surround FX or Bus Channel, the Send Panner is replaced with a Surround Panner. This allows for accurate FX placement of any source. Note that the Channel and Send Panner formats need to match for the “Lock Pan to Channel” option to work.
A send panner cannot be a Spatial Object panner.
Remapping Effect Channels in Spatial Audio
Any effect can be used in the surround audio format. For any mono, stereo and surround plug-in, the available processing channels can be individually mapped to outputs or muted.
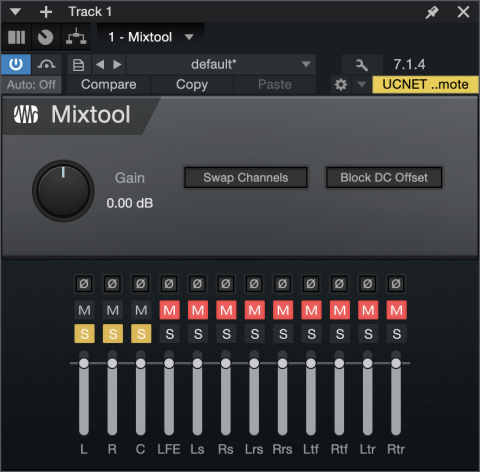
The current effect speaker configuration is displayed on the top center of the plug-in header next to the wrench icon. Note that effects that are natively capable of surround adapt to the song configuration (e.g. 7.1.2). When effect configuration is below song configuration (e.g. when effect is configured to Stereo and the song is configured to 7.1.2), click onto the wrench icon to access speaker channel mapping.
From within the "Speaker Mapping'' dialog, channels can be reordered by dragging from their handle (right hand side). Simply click and drag the desired outputs vertically to re-assign their speaker channels. You can also click the buttons in the FX column to bypass output to individual speakers.
The plug-in output automatically reverts to Studio One Pro’s routing so the signal flow is correct. Additionally, the mapping settings for each plug-in speaker format combination are automatically stored and restored when a new plugin instance is inserted. As long as the speaker formats of the source and destination channels are the same, you can copy plug-ins with custom plug-in speaker mapping settings to another track.
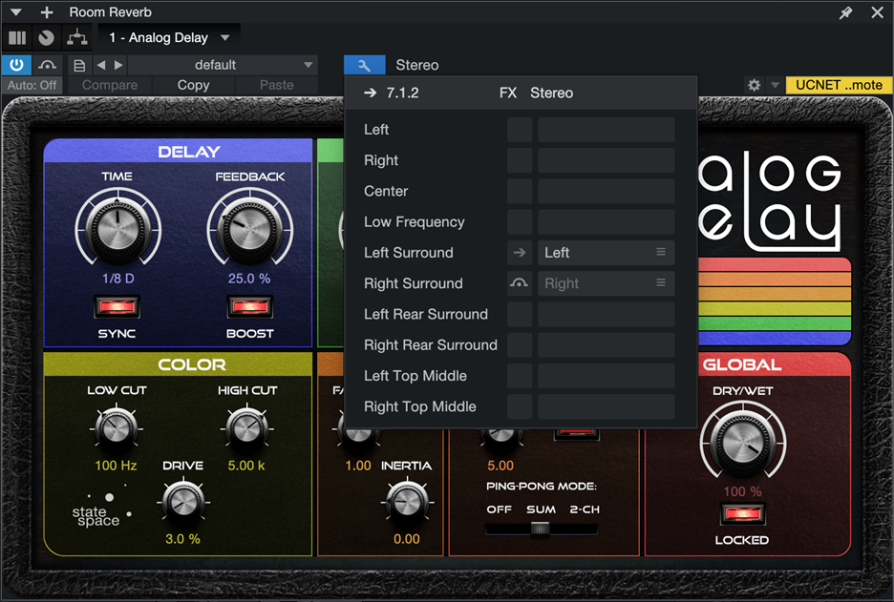
In this example, Analog Delay - a stereo effect - has had its Left and Right outputs mapped to the Left Surround and Right Surround outputs.
Special Multichannel Functionality
Phaser, Flanger, MixTool, Level Meter, and Spectrum Meter all offer special functionality for Spatial Audio that varies per plug-in. For more on these specific plug-ins, visit Built-in Effects.