The Launcher
Studio One Pro features a fully-integrated Launcher, which provides a new and exciting approach to writing, arranging, producing and performing music in Studio One Pro.
The Launcher is perfect for those interested in loop-based music creation and production; additionally, the Launcher can prove helpful if you would like to quickly test new song arrangements without affecting what’s within the Timeline. As a part of the Arrangement and side-by-side with the Timeline, the Launcher offers a whole set of new workflows, allowing users to move freely between these two environments.
Before jumping into the Launcher features, a few notes about nomenclature first:
-
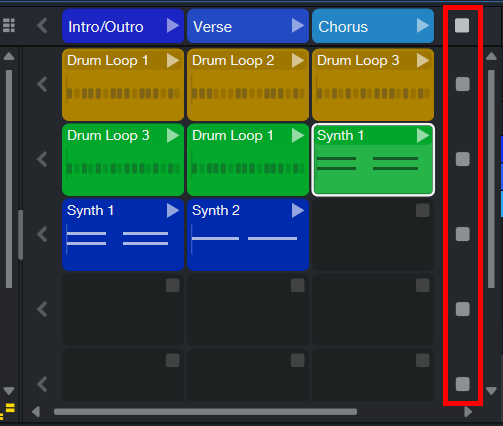
The Launcher contains Cells, which can hold Audio Events, Instrument Parts, or patterns, depending on which track they’re on. Just like Events and Parts on the timeline, Cells only contain references to the actual Audio Clips (shown in the Pool).
-
Cells are organized into Scenes, which represent vertical stacks (or columns) of Cells. These Cells play simultaneously when the Scene is played.
-
Scenes can be organized into Playlists, which contain any number of Scenes in any order. If Scenes represent sections of a song, a Playlist could be a complete song.
How to Open the Launcher
The Launcher can be used either exclusively or side-by-side with the Timeline, which allows for a wide variety of exciting use cases.
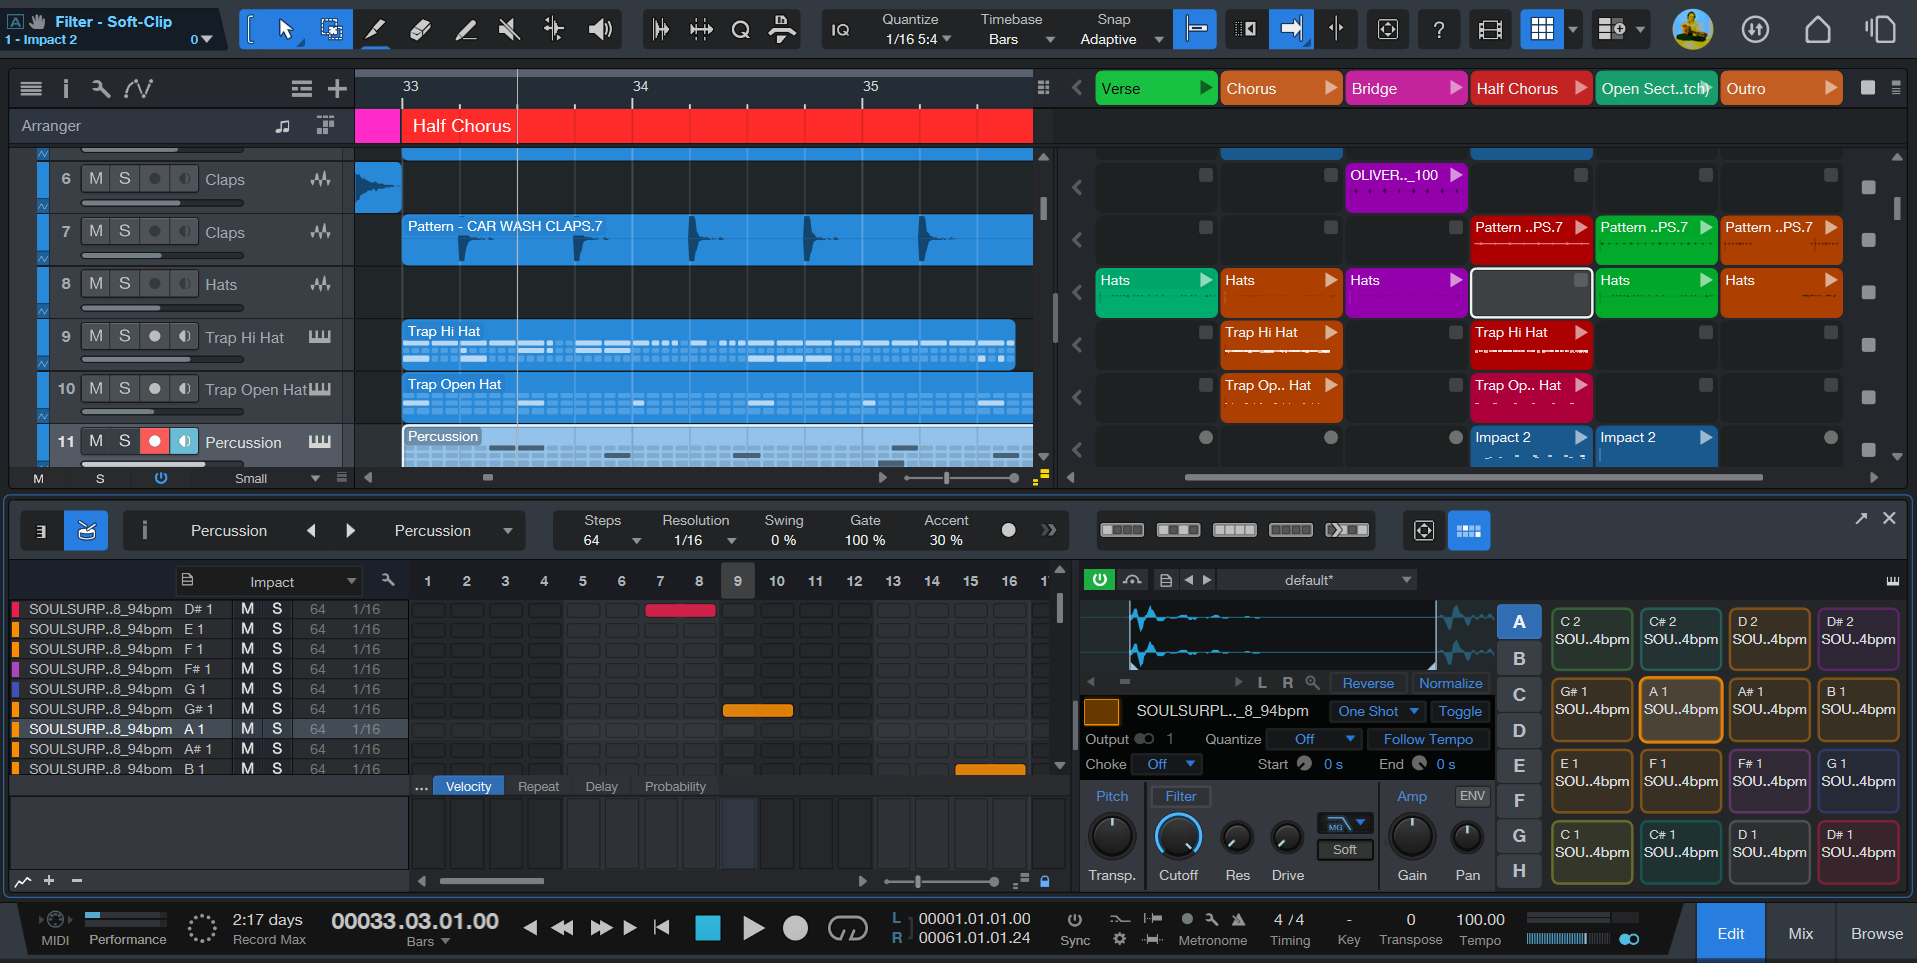
To open the Launcher, press the Launcher button on the Toolbar or press “B” on your keyboard. The Launcher has a context menu; from here, you can enable Side-by-Side or Exclusive mode. In other words, you can view the Launcher and the Arranger Timeline side-by-side or by itself.

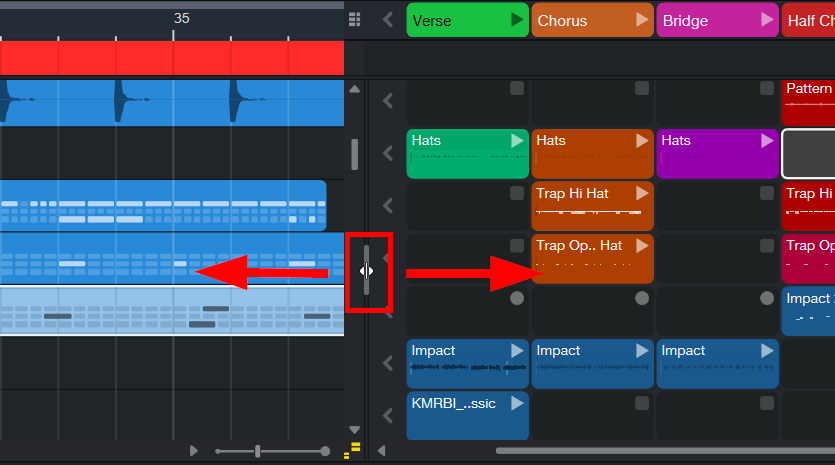
If you choose Side-by-Side mode, you can resize the Launcher page by clicking and dragging the dividing bar between the arrangement and Launcher horizontally:
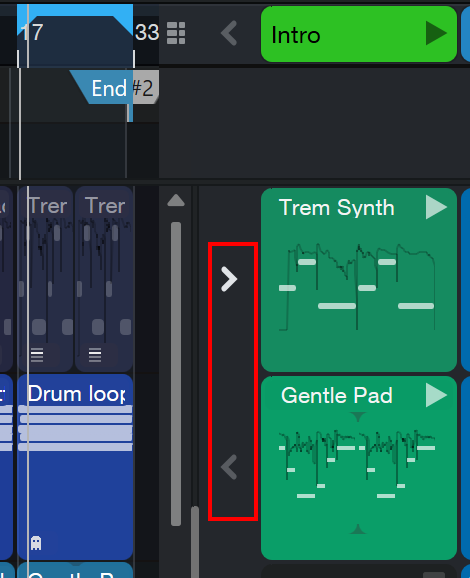
Alternatively, if you’d like to quickly switch between the two modes, select the button located at the top right of the Launcher:

Note: You can’t use the Launcher and Scratch Pads at the same time. Likewise, you cannot view the Timeline, Launcher and Scratch Pads at the same time.
Play Focus
Studio One Pro allows you to use the Launcher and the Timeline at the same time. Since both are sharing the same tracks, you can decide which tracks are playing Launcher Cells, and which are playing what’s on the Timeline. To switch the playback focus, each track has a Play Focus button (“>”), located between Timeline and Launcher divider:
In addition, the Global Play Focus button at the top switches the playback focus for the entire Arrangement:

Adding Content to Cells
A new song or new Launcher has nothing but 8 empty Scenes in it. There are multiple ways to add Cells with content:
-
From an existing Arrangement (and in Side-by-Side view), drag any Audio Event/Part, Instrument Part or Pattern into the Launcher. A new Cell is created right where you drop it.
-
From the Browser (including Splice), drag any audio files, Audio Loops, Music Loops or Patterns into the Launcher, and Cells are created.
-
Record directly into Cells!
To record into cells, set up a track for audio or virtual instruments, then record-enable the track. Press the Record button within the Cell you want to record to:
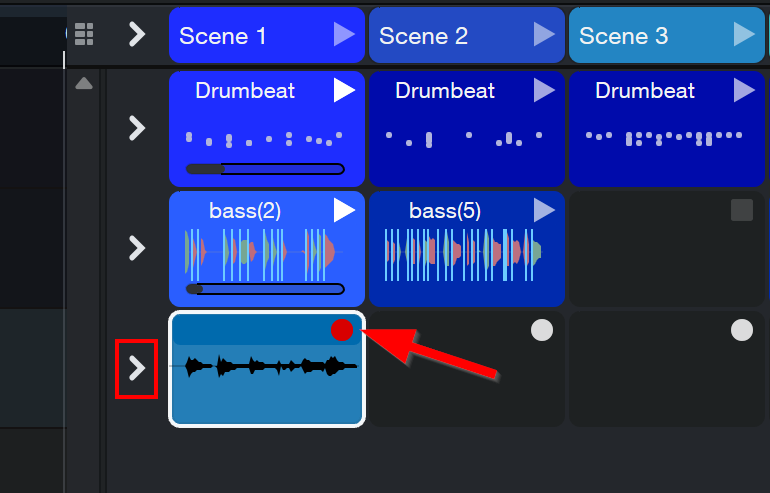
When recording into the cell, the play focus determines what playback you record to.
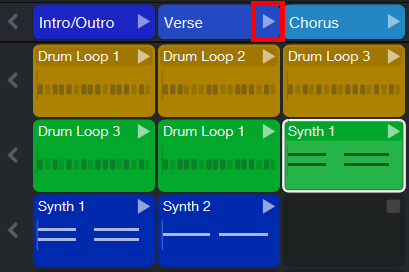
To start playback of a Cell, click on its Play button (located at the top right of each cell).
To stop playback, press Stop on the Transport Bar, or press the Stop button for the Launcher track (the column of Stop buttons on the right side of the Launcher window). Pressing the Global Stop button at the top right of the Launcher will stop all cells at once:
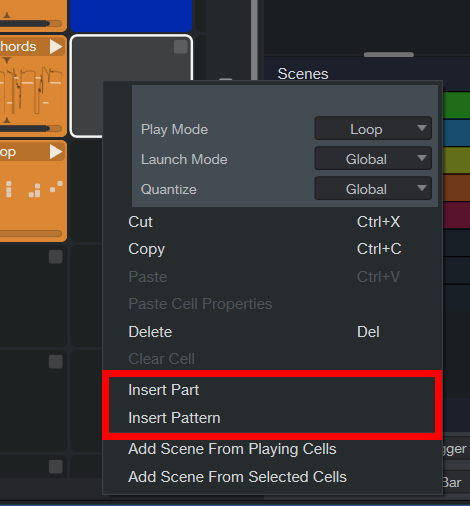
To create a part or pattern within a cell, simply right-click onto the empty cell and choose “Insert Part” or “Insert Pattern” from the context menu:
Double-clicking onto the cell’s new part or pattern will open the Editor. From there, you can edit the part or pattern just as you would for a part or pattern within the arranger timeline.
Cell Editing
You can edit the contents within Cells the same way as you’d edit events in the Timeline. Double-click on a Cell to open the Editor.
Note that each Cell has independent and Start Marker and Loop Start/End Markers. Use these markers to define how the Cell content is played. The Start Marker will be a green arrow, while the Loop Markers appear just as they do everywhere else in Studio One Pro:
![]()
If you create copies of the same Cell in different Scenes, each Cell has independent Start, Loop Start and Loop End settings, allowing for some cool tricks based on the same content.
Make a Scene, then some more
Cells inside the Launcher are organized into Scenes. The Launcher always starts with 8 scenes. To create more, double-click the empty space next to the last Scene, click onto the plus icon next to Scene 8 in the Launcher header, right-click on a Scene header to find the “Add Scene” context menu option, or drag any Event/Part onto the empty space beside the available Scenes.
As discussed above, you can fill Scenes by adding new content into Cells, copying the content within Cells from other Scenes, or moving existing Cell content to new Scenes with drag & drop.
You can play a Scene (with all Cells below it) by clicking the Scene Play button in the Launcher header. Press Play on another Scene to play it next:
To stop playback, either press Stop on the Transport Bar or click the Scene Stop button located on the top right side of the Launcher header.
From Timeline to Launcher…
If you don’t start from an empty session but open an existing Song instead, you can drag & drop elements from a linear Timeline arrangement into the Launcher as “raw material” for creating something new. Instead of dragging single Events or Parts, try dragging multiple all at once. Also, if your timeline has an Arranger Track, try dragging an entire Arranger Section to a Scene inside the Launcher.
… or Launcher to Timeline
Let’s say you just used the Launcher as a starting point for a new arrangement. Or maybe you created an entire song using Scenes and Playlists. You can always move things back into a linear Timeline for further editing or mixing. There are several ways you can do this:
-
Drag & drop Cells to the Timeline, single or multiple. Drop them anywhere.
-
Drag a Scene to the Arranger Track, which adds the Scene as a new Section.
-
Open the popup menu next to a Playlist, and select “Insert Playlist into Song…”
Finally, you can record a Launcher performance live and in real time into the Timeline. First, make sure the playback selector is set to Launcher for all Tracks. Start recording, then initiate playback on any Cells or Scenes.
You can combine this with writing automation while performing using your favorite hardware controller.
How to use Playlists
Scenes can be arranged into Playlists, which is as simple as dragging any of the existing Scenes from the bottom of the Inspector to the top Playlist section:

To open the Scene Playlist, click onto the Scene Playlist button ( ) located at the top right of the Launcher or click on the “Show Playlist” option in the Launcher context menu located in the toolbar.
If you would like to repeat any of the scenes, enter the number of repetitions next to the scene names (or enter “n” to repeat the Scene indefinitely, until you click “Continue”):
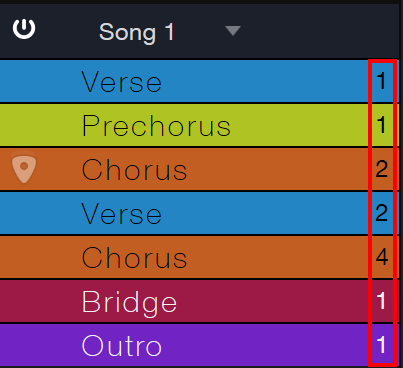
A Song can hold an unlimited number of Playlists, each of which representing a different arrangement of the same Scenes. This can be one song, or many songs–you can store an entire live performance!
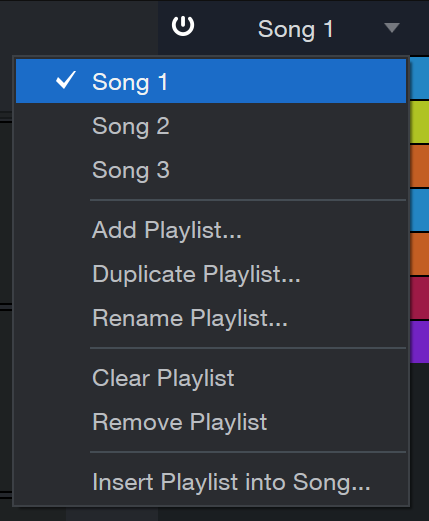
From the Playlist context menu, you can switch between playlists. Additionally, you have access to these Playlist options:
-
Add Playlist… Click this to add a new playlist.
-
Duplicate Playlist… Click this to duplicate the selected playlist.
-
Rename Playlist… Click this to rename your playlist.
-
Clear Playlist Click this to clear the scenes within your playlist.
-
Remove Playlist Click this to delete the selected playlist.
-
Insert Playlist into Song… Click this to insert the selected playlist into the Arranger (see below for more information).
Setup and Options
To get the most out of the Launcher, here are a few ways to customize its setup. First, take a look at the Global Settings, which are located at the bottom of the Scenes/Playlist Inspector:

Alternatively, these settings are also available from the Launcher button context menu on the Toolbar.
These settings apply to all Cells and Scenes:
-
Launch Mode controls how Cells are played by default:
-
Trigger: One click on the Play button initiates, or retriggers, playback.
-
Gate: Click and hold the Play button to start, release to stop playback.
-
Toggle: Click the Play button once to start playback, and click it again to stop.
-
-
Quantize controls when transport commands (Play/Stop) are executed, which is important for live performance or live recording. The default setting is 1 Bar, but Quantize can be set to any value from “Off” (instant) to “1/16 note”.
-
Note: Keep your position in the timeline in mind when changing the Quantize settings. Regardless of whether the Arranger page is open or not, a cell set to quantize to 8 bars will always start playing at bar 1, bar 9, bar 17, bar 25, etc. The starting position of the cell loops depends on where the current playback cursor position is when the cells are triggered.
-
Depending on where the current playback cursor position is when the cells are triggered, quantized values below 1 bar may cause your cell playback to fall offbeat.
-
In addition to these global settings, each Cell has individual settings, which override the global settings.
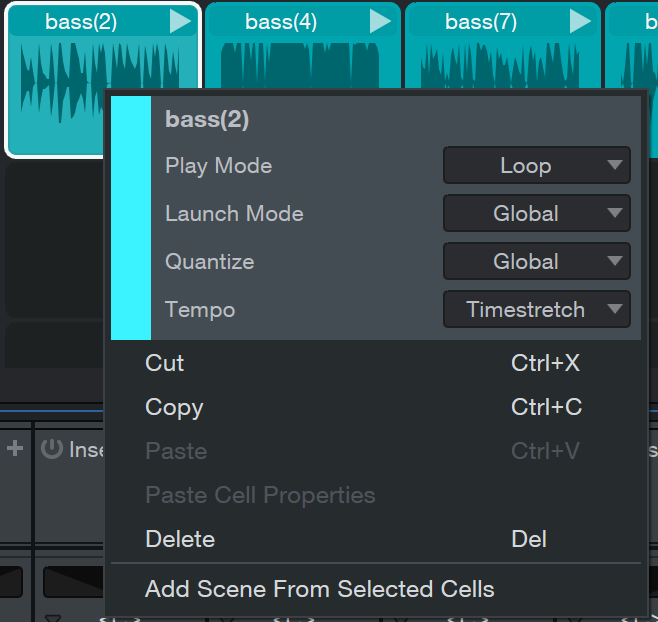
Right- click on a Cell to access these Cell options:
-
Play Mode: Here, you can change the Cell playback mode from “Loop” to “One-shot.” Loop mode enables scenes to play in a loop with a defined number of repetitions (controlled via the repeat counter parameter in the Scene Playlist). With one-shot mode enabled, scenes in Playlists play only once (similar to setlist items in Show Page).
-
Launch Mode: Like the global Launch Mode, this parameter allows you to control how cell playback is controlled (Global is default, Trigger, Gate, or Toggle are available here as well).
-
Quantize: Same as global Quantize, this controls the timing when Cells are played.
-
Tempo: This can be set to Timestretch, Follow, or Don’t Follow. These work in the same way as the Tempo options on the Track when the Timeline arrangement is used.
Beyond the normal copy and paste options, you also have the following context menu options:
-
Add Scene From Playing Cells will paste the cells currently playing into a new Scene.
-
Add Scene From Selected Cells will paste all selected cells into a new Scene (select multiple by holding shift while clicking onto each Cell).
Note that to keep things organized, Cells and Scenes have the familiar name and color options. The same Cell options are also available in the Event Inspector as long as the Inspector is shown. The Cell must be selected for the Cell information to appear in the Event Inspector.
Export and Mixdown options
Assuming you created a complete song inside the Launcher using Playlists, these can be exported directly without having to move them to the Timeline first. For more information about Export and Mixdown options, please refer to the instructions in Mixing Down.
Launcher Remote Control Support
Both ATOM and ATOM SQ PreSonus® Controllers can be used to control the Launcher in Studio One Pro, making them the perfect companion hardware controllers both in the studio and on stage.
No firmware updates are required, since both controllers get their integration features directly from Studio One Pro. This includes a new “Launch” mode, triggering Cells and Scenes, and navigating the grid. Please refer to your ATOM or ATOM SQ Owners Manual for more information about the ATOM’s Studio One Pro Integration.