Clips and Clip Gain Envelopes
About Clips
In Studio One Pro, a "Clip" is a representation of an audio file that is used in a Song. The audio file itself is typically stored in the Song's Media folder; though, it can be stored in another location, in which case it's called an "external file."
The reason we use Clips in Studio One Pro is because they also contain metadata describing the processing of the audio file they represent—its Gain Envelopes, bend markers, Melodyne edit state, chord data, and more. This allows the Clip’s metadata and attributes to be used in different ways on different Audio Events without the need for bouncing (duplicating) the actual audio file. This lets you get many different sounds through different processing of the same audio file while keeping your Song folder size under control .
Audio you record or import (depending on the preference setting for "Ask to copy external files when saving Song") are represented as Clips in the Browser’s Pool, while the actual audio files are stored in your Song’s Media folder. Either can be explored in the Pool tab of the Browser. You can add Clips to a Track from the Pool via drag and drop.
Clips make nondestructive editing of your sounds possible because most edits made to Audio Events in Studio One Pro are actually affecting the Clip’s metadata, and not the audio file itself.
Edits made to a single Clip will ordinarily affect every instance of the clip in a Song. This can prove undesirable in some cases—and can be avoided by using...
Clip Versions
A Clip Version is a completely separate copy of a Clip with its own, independent metadata that can be manipulated independently of that of its parent audio file. Clip Versions will allow you to apply different Melodyne or Gain Envelope edits to different instances of the same audio. This means you can make multiple Clip Versions of the same Audio Event with no need to use up hard drive space with extra copies of the same audio file!
An example use case involves Melodyne and the Chord Track. If you would like to use Melodyne to have an audio loop follow chords on the Chord Track, each instance of the loop will require different Melodyne edits to manipulate the playback depending on the chord changes on the Chord Track. Clip Versions solve this issue by letting you create multiple Clips with different pitch corrections from Melodyne.
You could also use Clip Versions to create several different instances of a single drum loop that each contain different Gain Envelopes. This allows you to create evolving rhythmic patterns over the course of a song without the need for repeated bounces.

To create a Clip Version:
-
[Right-Click] an Audio Event
-
Choose “Audio”
-
Choose “New Clip Version”
This will create and apply a new instance of the Clip whose parameters can be modified without affecting other instances of the same audio. Try editing the new Audio Event’s Gain Envelope, and note that these changes do not affect the original Event.
To create multiple Clip Versions simultaneously, you can use “Separate Shared Copies.”
-
Use the Arrow Tool to group-select several instances of the same Audio Event, such as duplicates of the same loop.
-
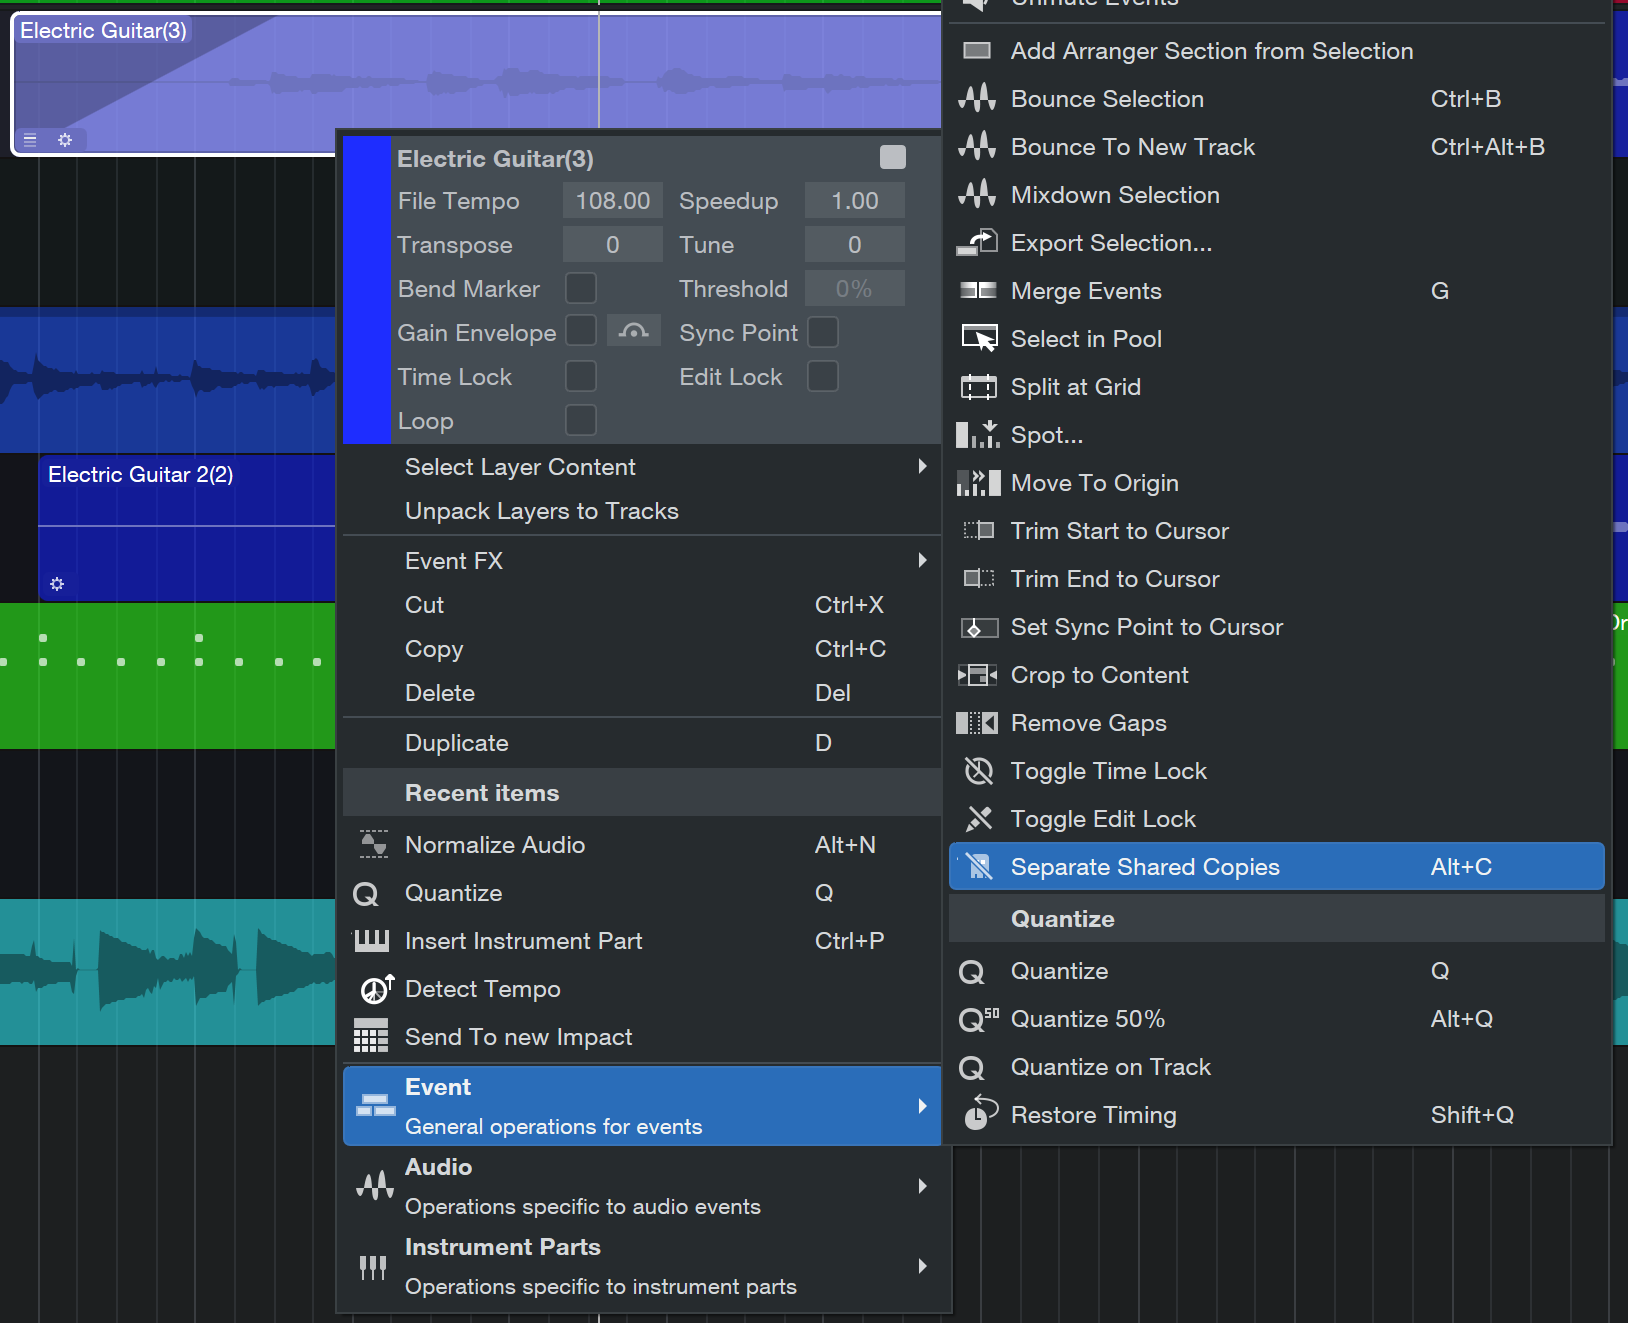
[Right-Click] any of the selected Audio Events
-
Choose “Event”
-
Choose “Separate Shared Copies”
(Alternatively, you can group-select Audio Events and press [ALT-C] to apply “Separate Shared Copies.” )
"Separate Shared Copies" then creates one new copy of each Clip Version used by the selected Audio Events. Groups of Events sharing a Clip Version will still share the new Version.
Clip Versions will be labeled in the Pool tab of the Browser with a small number icon to the left of their waveforms. The version number is also visible in a small number icon on the lower left of the Audio Event itself in the Arrange Window.
Note that clip versions cannot have individual tempos.

Clip Versions can be dragged and dropped from the Pool into the Arrange Window. Hold [ALT] while dragging a Clip Version onto a Clip to replace it with the dragged Version.
Clip Gain Envelopes
To view the Gain Envelope for the selected Audio Event, [Right]/[Ctrl]-click and enable the Gain Envelope box in the menu. A white line inside the Audio Event shows the current Gain Envelope. If a Gain Envelope does not already exist, the white line runs horizontally through the zero point of the waveform.
Note that Clip Gain Envelopes are Clip-based. Any changes made to an Audio Event will affect all shared copies of that Audio Event—unless you use Clip Versions, of course.
Mouse Tool Access
To open the list of mouse tools when the Gain Envelope is already visible, hover the cursor in an empty space above the zero line. When it changes into the Trim Tool, use [Right]/[Ctrl]-click to access the mouse tools.
Using the Arrow Tool
The Arrow tool can be used to add new points to a Gain Envelope, move existing points, and select points for deletion. Note that Gain Envelope points can also be selected using the left and right arrow keys. Multiple points can be selected at once by holding [Shift] or [Option] and selecting the desired range, and then edited simultaneously as described in the following sections.
After the first point is added, the gain of the entire Audio Event can be changed by dragging that point up or down.
To add a new point, click anywhere on the current Gain Envelope. If other points exist, you can click-and-drag the new one to the desired position to create a new segment.
Move or Modify a Gain Envelope Point
To move a Gain Envelope point, click-and-drag the point up or down, left or right. Vertical changes affect the value; horizontal changes affect the timeline position. Moving a point below the center of the waveform reduces the gain, while moving it above the center increases the gain.
When moving an Envelope Gain point, the pop-up value indicator displays the position, current value, and the amount of change from the previous value.
If Snap is engaged in the Arrange view, the point snaps to the grid when the cursor is released.
To enter a specific value for an existing Gain Envelope point, [Right]/[Ctrl]-click on the point and type a number into the Value field.
Another way to change a value is to float the Arrow tool over a point, hold [Alt]/[Option], and scroll the mouse wheel to move the point up or down.
To fine-tune the value or location of a Gain Envelope point, hold down [Shift] while moving the point.
If you drag a Gain Envelope point beyond other points, those points are moved also. The original positions are remembered until the cursor is released, and then any duplicate points at that position are deleted. To restore the deleted points, undo the action.
Delete a Gain Envelope Point
To delete an existing point on a Gain Envelope using the Arrow tool, select the point and press [Delete], or [Right]/[Ctrl]-click on the point and select Delete from the pop-up menu.
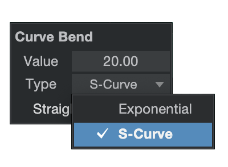
Change the Segment Curve
When you hover the cursor over a Gain Envelope segment a curve handle appears on the white line. Click-and-drag the handle up or down to shape the curve of that segment. For more precision control, [Right]-click the handle to access a contextual menu that will let you enter the desired curve value and type of your choice.
Using the Paint Tool
The Paint tool draws a series of Gain Envelope points with a single action. You can click-and-drag anywhere inside the Audio Event to add new points; you don't have to click on the existing Gain Envelope first.
The menu arrow under the Paint tool icon reveals the list of Paint tool shapes: Freehand, Line, Parabola, Square, Triangle, Saw, Sine, and Transform.
To switch from the Paint tool to the Arrow tool temporarily, hold [Alt] and then click-drag across the Audio Event.
For more information about the paint tool, see the Editing Automation Envelopes page.
Draw a Gain Envelope
Using the Paint tool, click-and-drag inside the Audio Event to draw a Gain Envelope. Note that drawing new Gain Envelope points overwrites any existing points.
Draw with Shapes
With one of the Paint tool shapes selected, click-and-drag across the Audio Event to draw a new envelope.
When using the waveform shape tools, hold [Alt] while dragging to adjust the frequency of the drawn waveform, or hold [Ctrl] to vary the amplitude and polarity of the waveform. Hold [Ctrl]/[Cmd]+[Alt] while drawing to move the Gain Envelope shape left or right along the timeline.
Transform a Gain Envelope Segment
The Transform tool can be used to alter existing Gain Envelope segments, or to add a new one. With the Transform tool selected, click-and-drag a selection box around any area of a Gain Envelope; then, adjust the selection box by clicking-and-dragging one of eight handles (four sides and four corners) to scale the selected Gain Envelope points.
Using the Range Tool
The Range tool can be used to trim selected areas of the Gain Envelope up or down in value. This can be done in two ways:
Trimming a Gain Envelope Segment
If you want to trim a single Gain Envelope segment, select the Range tool and hover the cursor in the upper half of the segment until the cursor changes into the Trim Tool. Click-and-drag up or down to change the selected Gain Envelope segment.
Trimming a Gain Envelope Range
If you want to trim several Gain Envelope segments at the same time, use the Range tool to select a range of the Gain Envelope. Then, hover the cursor in the upper half of the selected range until the cursor changes into the Trim Tool. Click-and-drag up or down to trim the selected range of the Gain Envelope.
Bypass the Gain Envelope
A Gain Envelope can be bypassed temporarily so you can compare the Audio Event with and without the Gain Envelope. To do this, [Right]/[Ctrl]-click the Audio Event below its zero point and activate the Bypass button. This technique also allows you to disable the Gain Envelope without resetting it. The status of the Bypass button is saved with the Song.
Reset the Gain Envelope
To remove all Gain Envelope segments from an Audio Event, [Right]/[Ctrl]-click the Event, scroll down to the Audio Operations menu, and select Reset Gain Envelope from the menu.
Have Gain Envelope, Will Travel
When an Audio Event is moved its Gain Envelope moves with it because Gain Envelopes are Clip-based. This means the Gain Envelope also moves when "slipping" the audio within an Event.