Patterns
Instrument Parts are just the thing for long, evolving passages, recordings of live playing, and other, more linear musical uses. DAW-style sequencing allows for a level of bar-by-bar flexibility that the step sequencers and drum machines of the past can hardly match. However, sometimes it can be helpful to return to those older workflows, as evidenced by the recent resurgence of hardware sequencers.
Pattern-based sequencing treats musical phrases as individual elements, to be switched and swapped at will, looped and finessed. Enabling this kind of freewheeling arrangement and musical state of play is the role of Patterns, a type of musical part you can create in Studio One Pro.
Patterns have two modes of operation: One is designed for melodic and harmonic parts, showing available notes on a grid, corresponding to the related keyboard notes. The other is for drums and other percussive parts, and it offers automatic note/instrument naming when used with Impact, along with variable phrase lengths and note resolution for each note row.
You can enter notes into a pattern by hand with the pencil tool, or by using the Step Record mode, a note at a time with your MIDI controller of choice (including your QWERTY keyboard). There's also an option to convert an Instrument Part into a Pattern (and vice-versa), which makes pattern creation a breeze.
Patterns aren't just static blocks of note data, either. You can create endless variations which are stored within the Pattern. This lets you start with an idea and create iterations that you can easily switch between as you lay out your arrangement, bringing life to your sequences over time. Repeats and trigger probability can be applied per step, opening further avenues of expression.
Patterns can coexist on the same Instrument Track with standard Instrument Parts (even sitting right on top of them, if desired). This makes Patterns perfect for peppering your more traditional sequences with fills, turnarounds, and other flourishes.
Creating Patterns
There are two ways to create a Pattern: Convert an existing Part into a Pattern, or create an empty Pattern and fill it.
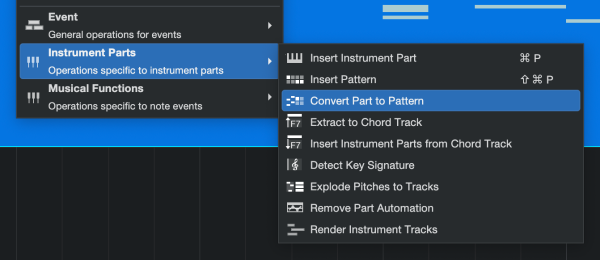
To convert an existing Part into a Pattern, [Right]/[Ctrl]-click on the desired Part and select Convert Part to Pattern from the Instrument Parts menu. This operation is also found in the Event menu. Studio One Pro determines whether the Pattern should use Melodic Mode or Drum Mode based on the Instrument, and the Part becomes a Pattern at that spot in the timeline. The maximum Pattern length is 64 Steps, so anything beyond that is truncated during the conversion.
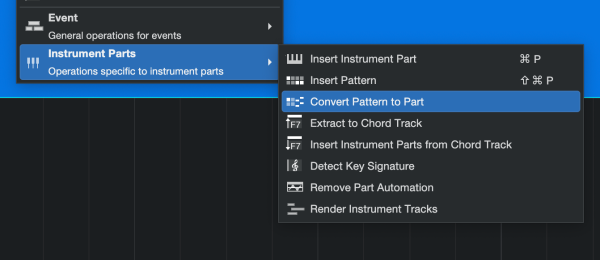
After editing the Pattern as described below, you can convert it back into a Part using the same method: [Right]/[Ctrl]-click the Pattern in the timeline and select Convert Pattern to Part, or select the operation from the Event menu.
To create an empty Pattern, select an Instrument Track, and navigate to Event/Insert Pattern or press [Ctrl]/[Cmd]+[Shift]+[P] on the keyboard. An empty Pattern is created on the selected track.
![]()
To begin working with the new Pattern, click to select it. You can then view it in the Note Editor pane.
![]()
If you plan to use this pattern to create melodic or harmonic content, select Melodic Mode by clicking the keyboard-shaped button shown above. For drums or other rhythmic parts, click the drum pad-shaped button.
Setting Pattern Length, Resolution, and Other Global Details

When you first create a Pattern its default state is 16 Steps in length, with 1/16th-note Resolution. This and other details can be easily changed using the parameters above the Pattern Editor window:
-
Steps: Sets the length of the Pattern, in steps. Each step is as long as the note value specified in the Resolution selector. Click the triangle to open a menu of preset lengths. To enter a custom length, click the step number and type in the desired value between 2 and 64 Steps.
-
Resolution: Sets the note value of each step in the Pattern. Defaults to 1/16th-notes, with a range between 1/2-notes and 1/64th-notes, with triplet ("T") and dotted ("D") variants of each.
-
Swing: Sets the rhythmic relationship of each pair of steps. Defaults to 0%, with each note falling on even divisions. As you increase the percentage, the second step of each pair (2, 4, 6, and so on) is moved closer to the note to its right.
-
Gate: Sets the length of each note. Defaults to 100%, with each note filling the entirety of its note value. As you decrease the value, each note becomes shorter and shorter. Values higher than 100% lengthen each note, with a maximum value of 200%. Note that changing the Gate value of a tied note only affects the duration of the final tied step. For example, a Gate value of 200% applied to two tied 16th-notes results in a 1/16th note tied to an 1/8th note. Conversely, for this example a Gate value of 50% results in a 1/16th note tied to a 1/32nd note.
-
Accent: Sets the amount of emphasis placed on Accented notes. Defaults to 30%. As values increase, the effects of Accent increase.
Entering Notes
One easy way to begin fleshing out a pattern is to use the Pencil Tool. Click on a place in the grid to add a note. Click a note again to erase it. Hold [Shift] while erasing to erase notes on multiple lanes or pitches. You can also click and drag across a row to add multiple notes in Drum Mode or set the note length in melodic mode in one gesture. Hold [Ctrl]/[Cmd] to enter or toggle the accent.
Tied Notes and Chords
To enter a tied note, hold [Shift] and drag across two or more steps. Use this method to shorten a note, too: hold [Shift] and drag to the left across a long note until it occupies the desired number of steps. [Shift]-drag to the left inside the first step to reset a long note to a single step.
When several notes of the same length occupy the same step in Melodic Mode, they are a Chord. To make a Chord longer or shorter, hold [Ctrl]/[Cmd] + [Shift] and drag to the right or left across one of the notes.
Step Recording
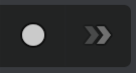
Another way to add notes to a pattern is Step Recording. When you press the Step Record button, shown above on the left, you enter Step Recording mode. To choose where in the Pattern to begin entering notes, click the step number above the desired column in the grid. Play a note on a connected MIDI controller, and it is entered into the Pattern. You can play other notes while the first note is held to enter multiple notes on a single step. When you let go of the notes, the Pattern advances to the next step, and you can enter the next note or Chord.
Rests and Tied Notes / Chords
To insert a rest, click the double-arrow "Insert Rest" button to the right of the Step Record button. To enter a tied note or Chord, click the Insert Rest button before releasing the note(s).
When you're finished Step Recording, press the Step Record button again to go back to the standard mode.
Real-time Recording into a Pattern
At times you may prefer to enter a basic idea into a Pattern in real time, and then make precision edits to the notes and their durations using the features of Pattern mode. Studio One Pro can do this, too.
- Create a pattern
- Drag across the Ruler and set the loop boundaries to match the Pattern
- Enable Loop mode
- Press [F2] to open the Pattern Editor
- Enable the Record / Step Record button inside the Pattern Editor window
- Press Play (or use the space bar) to start the Transport
- Play notes on your controller as the Pattern loops.
This method can also be used to record notes into a pattern variation in real time.
Switching Between Patterns on the Timeline
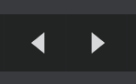
When editing a Pattern, if you'd like to edit another pattern that precedes or follows it on the timeline, click one of the Edit Previous Pattern / Edit Next Pattern buttons (pictured above) to switch between them.
Pattern Editing Operations
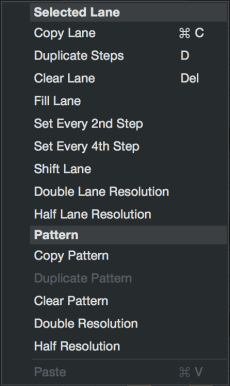
When you [Right]/[Ctrl]-click in the Pattern Editor a list of editing operations is shown in a pop-up menu. The size of the list is different for Melodic Mode and Drum Mode.
Melodic Mode: These pattern-level operations are also available in Drum mode.
- Copy: Copies the entire contents of the current Pattern so that it can be pasted into another Pattern, or into another Variation within the same pattern.
- Paste: Applies the note data in the clipboard to the currently selected Pattern.
- Duplicate: Copies notes from the first half of a Pattern and pastes them onto the second half, but only if there are no notes there already. To visualize this, enter a note on step 1 of an empty Pattern and Duplicate (use [D] as a shortcut). Step 1 is duplicated to step 5. Add a note to step 7 and press [D] again: steps 1, 5, and 7 appear at steps 9, 13, and 15. This is an easy way to populate a pattern with repeating Chords or hi-hat notes, for example.
- Clear Pattern: Removes all notes from the Pattern.
- Double Resolution: Doubles the resolution of the Pattern. This increases the number of steps that exist in the space of a 1/4-note, resulting in a decrease in the note value of each step. For example, if the default resolution of 1/16 is doubled, the note value of each step becomes 1/32. Note that the Pattern now runs twice as fast relative to tempo. Studio One Procompensates by doubling the number of steps in the Pattern, up to the maximum of 64 steps.
- Half Resolution: Reduces the Pattern resolution by half. This decreases the number of steps that exist in the space of a 1/4-note, resulting in an increase in the note value of each step. For example, if the default resolution of 1/16 is cut in half, the note value of each step becomes 1/8. Note that the Pattern now runs half as fast relative to tempo. Studio One Pro compensates by reducing the number of steps in the Pattern by half.
Drum Mode: Listed below are the Selected Lane operations. The Pattern operations are the same ones listed above.
- Copy Lane:Copies the note information in the currently selected lane. To apply it to another lane, select the lane, then [Right]/[Ctrl]-click and choose Paste.
- Paste: Applies the note data in the clipboard to the currently selected lane.
- Duplicate Steps: Copies the contents of the selected lane and pastes them into place in the next available open space.
- Fill Lane: Adds notes to every available step in the currently selected lane.
- Clear Lane: Removes all notes from the selected lane. [Delete] or [Backspace] can also be used; just be sure you've selected the lane first.
- Set Every 2nd Step / 4th Step: Adds notes to every 2nd or 4th step in the currently selected lane, per the selected operation. This replaces any existing steps. Notes can be added or erased as needed. Use the Shift Lane feature to move the new steps to the offbeat if you like.
- Shift Lane: Shifts the notes of the currently selected lane to the right by one step. This is a great way to discover unexpected rhythms! Do this enough times and the notes re-appear on the left side. Note that tied notes only re-appear once the entire note value has shifted beyond the end of the Pattern.
- Double Lane Resolution: Doubles the resolution of the lane. This increases the number of steps that exist in the space of a 1/4-note, resulting in a decrease in the note value of each step. For example, if the default resolution of 1/16 is doubled, the note value of each step becomes 1/32. Note that a lane now runs twice as fast relative to the other lanes.
- Half Lane Resolution: Reduces the lane resolution by half. This decreases the number of steps that exist in the space of a 1/4-note, resulting in an increase in the note value of each step. For example, if the default resolution of 1/16 is cut in half, the note value of each step becomes 1/8. Note that the lane now runs half as fast relative to the other lanes.
The tool bar above the Pattern Editor window has shortcut buttons for many of the Drum Mode operations previously described (Set Every 4th Step, Set Every 2nd Step, Fill Lane, Clear Lane, and Shift Lane). These add even more options to enhance your workflow. They look like this:

Drum Maps and Names
Drum Mode lets you build and store custom drum maps for later recall. You can name each drum, place them in any order you like, and hide any drums that aren't being used in the current Pattern. There's also a General MIDI drum map to use as a starting point, if you like.
It all starts with pressing the wrench-shaped Edit button in the Drum Map selection window:
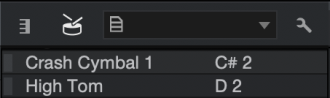
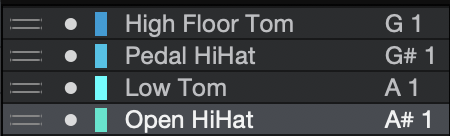
The drum list expands to reveal functions that can only be accessed here. Click a name field and you can name or rename any drum.
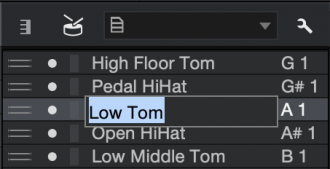
To the left of the name fields are three tiny areas that make a big difference:
Once the drums are arranged the way you want, you can save and name your new Drum Map. To do so, click the Pitch Names icon on the left side of the Drum Map selection window. Seven options are presented:

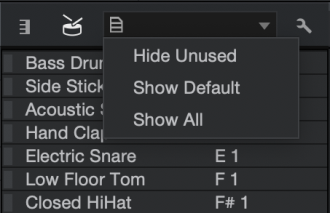
- Hide Unused: If you only want to see the drums currently used by the Pattern, select this option.
- Show Default: This selects the Drum Map you have stored as the Default Preset.
- Show All: This option reveals the drums the pattern isn't using, as well as the entire MIDI Note range.
- Reset Order: If you've reordered the lanes and want them to be placed according to their MIDI note number, select this option.
- Remove All: This will reset the lane order, clear all name fields, disable every lane, and reset the color selections.
- Store Preset...: Use this to save the current Drum Map for later recall. Give it a name, click OK, and it will appear in the Drum Map selection menu.
- Store as Default Preset: If there's a Drum Map you like to use as a starting point for other Drum Maps, use this option to designate it as the Default Preset. This creates a duplicate of the current Drum Map, gives it the name "default", and places it at the top of the Drum Map selection menu.
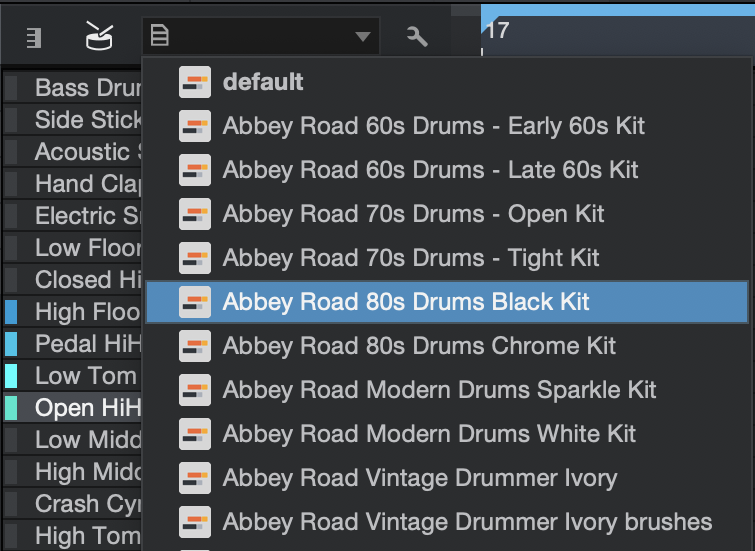
The Drum Map selection menu is available both outside and inside Drum Map Edit mode. Simply click the name of the current Drum Map to see the list and select a new Drum Map, as shown below.
The Pitch Names icon shows a smaller list of options outside of Drum Map Edit mode. They're identical to the first three options that are shown inside Drum Map Edit mode: Hide Unused, Show Default, and Show All. Please refer to the earlier section to learn what they do.
Drum Mode Lane Options
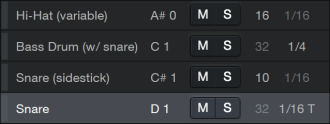
In Drum Mode you have the option to mute or solo each note individually, using the [M] and [S] buttons on each lane. You can also set a separate Pattern length and note resolution for each lane. This allows for intricate polyrhythms and a greater sense of movement over time.
-
To change the pattern length for a specific lane, click the current value and enter the value of your choice.
-
To change note resolution, click the current value and choose a new value from the pop-up menu.
Melodic Mode Lane Options
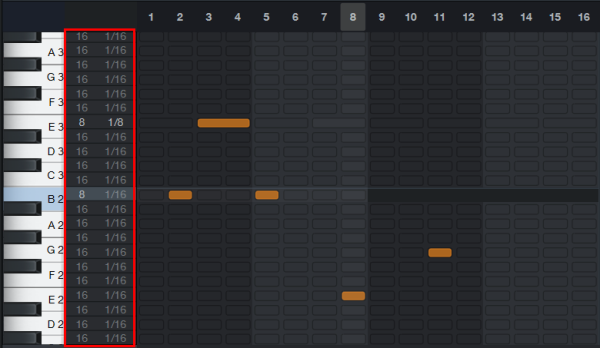
In Melodic Mode, you have similar lane options. Here, you can set a separate Pattern length and note resolution for each lane as well.
-
To change the pattern length for a specific lane, click the current value and enter the value of your choice.
-
To change note resolution, click the current value and choose a new value from the pop-up menu.
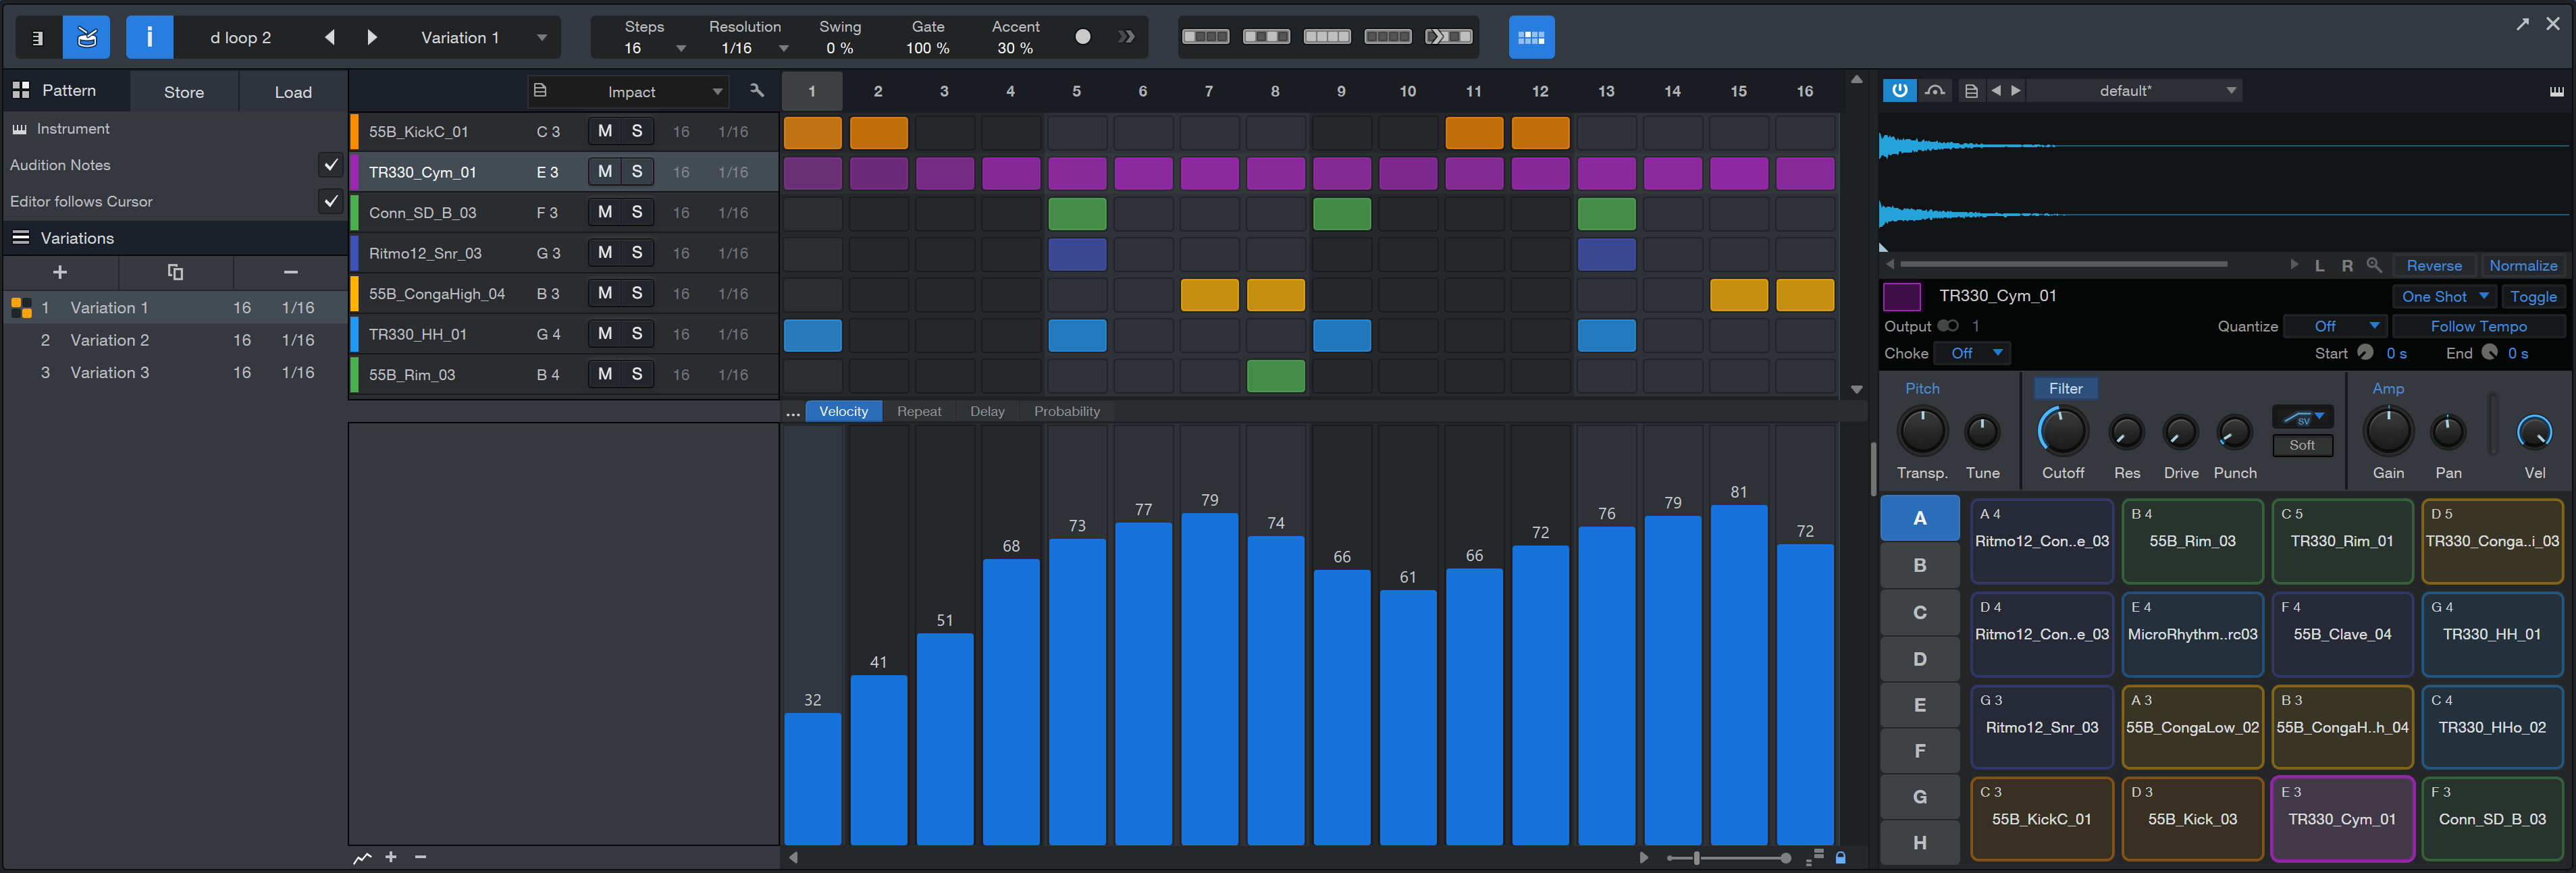
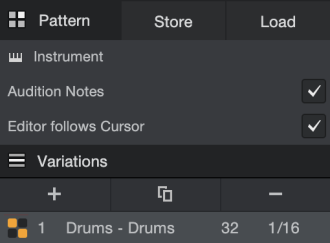
Pattern Inspector
If you open the Inspector while editing a Pattern, you see special options and commands that apply to working with Patterns:
-
Audition Notes: Enabling this option causes the notes you enter into your Pattern to play through the connected instrument as you add them, making it easier to tell whether you're on the right note or instrument.
-
Editor Follows Cursor: Enabling this option causes the Pattern Editor to show whatever pattern is currently being played on the current Track, as the transport travels along the timeline.
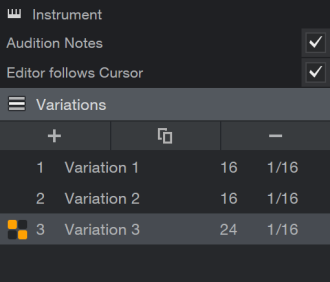
Variations
Each Pattern can hold an unlimited number of Variations. These can contain different note data, and have differing Step lengths and note resolutions. This provides you the opportunity to try a great many permutations of a Pattern without worrying about disrupting the others. To add an empty Variation to a pattern, press the plus-symbol button in the Pattern Inspector. To delete a Variation, select it and press the minus-symbol button in the Inspector. To rename a Variation, click its name and enter the name of your choice. Click-and-drag Variations to change their order.
At some point, you may want to duplicate a Variation to preserve its current state while editing its clone. To do this, select the Variation to duplicate and press the Duplicate button (which looks like this:  ).
).
To substitute one of a Pattern's Variations for the version currently sitting on the timeline, select the Pattern and double-click a Variation in the Inspector, or click the drop-down menu next to the Variation name at the top of the Pattern Editor.
Velocity, Repeats, Delay, and Probability
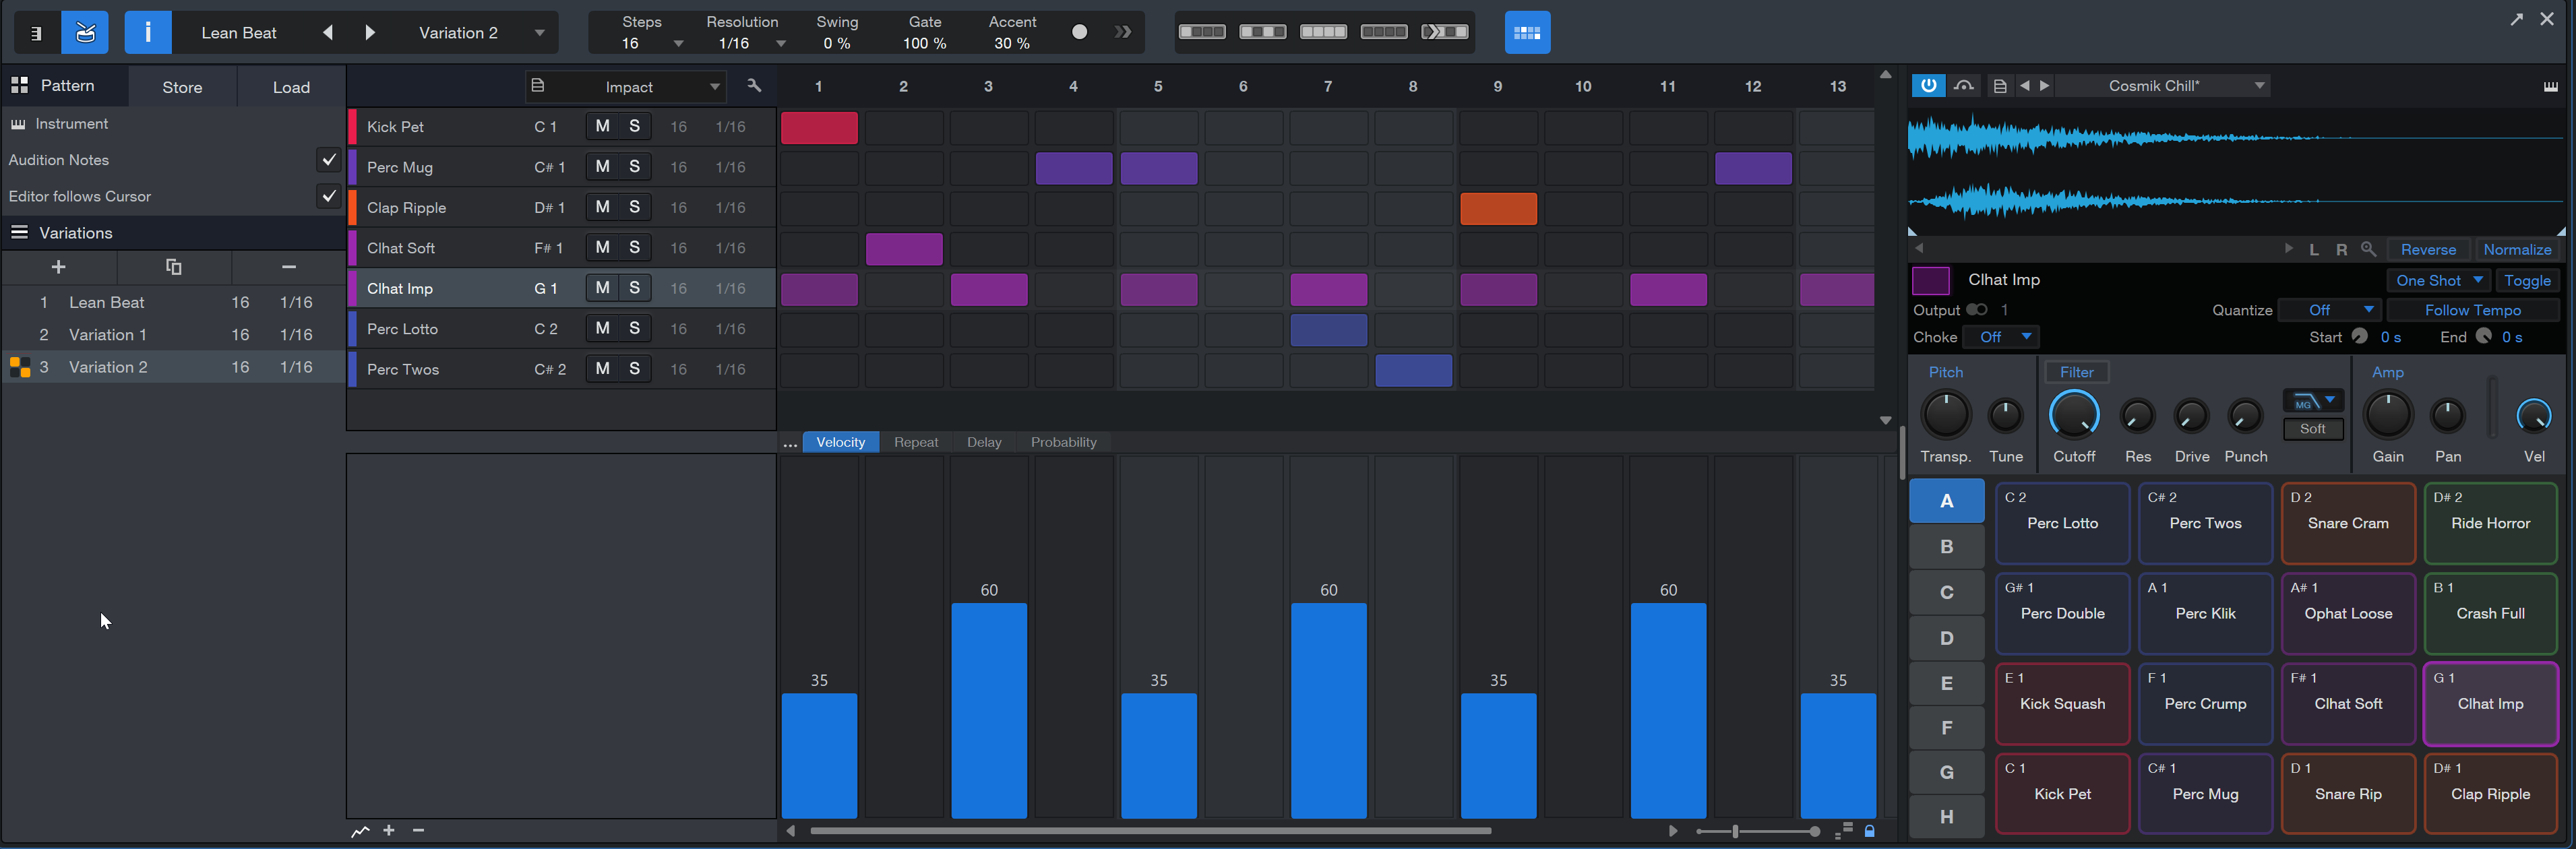
The more rigid step-based nature of Patterns (as opposed to the more free-flowing note placement of Instrument Tracks) enables some useful creative features. The per-step automation of parameter values is one of them.
In the bottom-left corner of the Pattern Editor there's a small button that looks like a couple of jagged mountain peaks ( ). Click that to show / hide the Automation Lanes. Along the top of this Automation window are the Velocity, Repeat, Delay, and Probability buttons (and a mysterious button marked "...").
-
Velocity: Click this button to allow setting of velocity for the notes in the selected lane (in Drum Mode) or for all notes on a given step (in Melodic Mode). Click and drag in the Velocity lane to set the value.
-
Repeat: Clicking this button lets you specify the number of repeats to apply to each note in the selected lane (in Drum Mode) or to all notes on a given step (in Melodic Mode). All repeats on a note are spaced equidistantly within the span of the note resolution of the Pattern. So, for example, a value of 4 repeats on a note in a pattern with 1/16th-note resolution results in four 1/64th-notes being played.
-
Delay: This is a great way to humanize a Pattern: Click the Delay button and select a value between +/- 50% for one or more Steps. Positive values make the Step happen later; negative values make it happen sooner. One caveat: it isn't possible to use a negative delay on the first step; notes before the start point of the Pattern will not play.
-
Probability: Clicking this button lets you specify the percentage of probability that each note in the selected lane will play (in Drum Mode) or that all notes on a given step will play (in Melodic Mode). Lower settings cause notes to be canceled in greater numbers, creating interesting variations as the Pattern plays.
Step Automation
Pressing the "..." button lets you access any available automation parameter on a step-wise basis, in the same way you can specify note Velocity throughout a Pattern. In the pop-up window that appears, select the parameters you wish to edit from the column on the right, and press the [<< Add] button to add it to the available Step Automation parameters. If you wish to remove a parameter, select it in the left column, and click the [Remove >>] button.
The parameters you add to the Step Automation system appear as additional buttons alongside the Velocity, Repeat, Delay, and Probability buttons. Click a parameter to access its settings over the steps of the Pattern.
After selecting the desired automation parameter, note the blue columns along the bottom of the Automation Lane. Each of these represents a step that can be automated for the selected parameter. You can adjust the columns individually or drag the cursor across the row and edit many of them in a single gesture. Then select another automation parameter and repeat the process until the Pattern is exactly the way you want it.
Adding Automation Lanes
To add additional lanes, to allow for more complex work with Step Automation, press the plus-symbol button to the left of the automation area. To collapse a lane, press the minus-symbol button.
Zooming Options
You can zoom in or out horizontally in Drum Mode by moving the Time Zoom control, and zoom vertically with the Data Zoom control.
When "Link Horizontal and Vertical Zoom" is enabled (in drum mode, the small lock icon is located on the bottom right corner of the editor), auto-zoom keeps the aspect ratio of the cells (like manual vertical zooming does). In this special mode, there is no difference between the 3 auto zoom modes (vertical, horizontal, full) because both directions are linked.
Pattern Management
Patterns are automatically saved with the Song in which they are created. But if you'd like to use a Pattern and its Variations in other songs, there are two ways to do that.
Store / Load Patterns
Open the Pattern Inspector to reveal the Store Pattern Preset / Load Pattern Preset buttons. To store the Pattern, click the Store button. The window that opens lets you name the Pattern, describe it, and either select a Subfolder or create a new one by typing a name into that field.
To load a different Pattern into the current song, click the Load button. A drop-down menu reveals the folder names. Open a folder, select the desired Pattern, and it appears in the Pattern Editor window.
Drag to / from Browser
Open the Browser and drag-and-drop the Pattern from the Arrange view to the desired folder in the Browser window. Studio One Pro stores Patterns on the Files tab, but you can drag the Pattern to the Loops tab if you like. Use the [Alt] key to specify whether to export it as a .pattern file or a .musicloop file. The difference is that a .musicloop file also recalls the instrument and its settings, not just the raw note data contained by a .pattern file. See Audioloops and Musicloops to learn more.
Whichever format you choose, you can drag-and-drop these files into future songs and re-use them wherever they may be useful.