Audio Tracks
Before recording can take place, you need at least one Track on which to record. Studio One Pro has two types of Tracks for basic recording: the Audio Track and the Instrument Track. Audio is recorded to Audio Tracks, while musical performance data is recorded to Instrument Tracks.
Creating an Audio Track
To create an Audio Track, navigate to Track/Add Tracks or press [T] to open the Add Tracks menu.
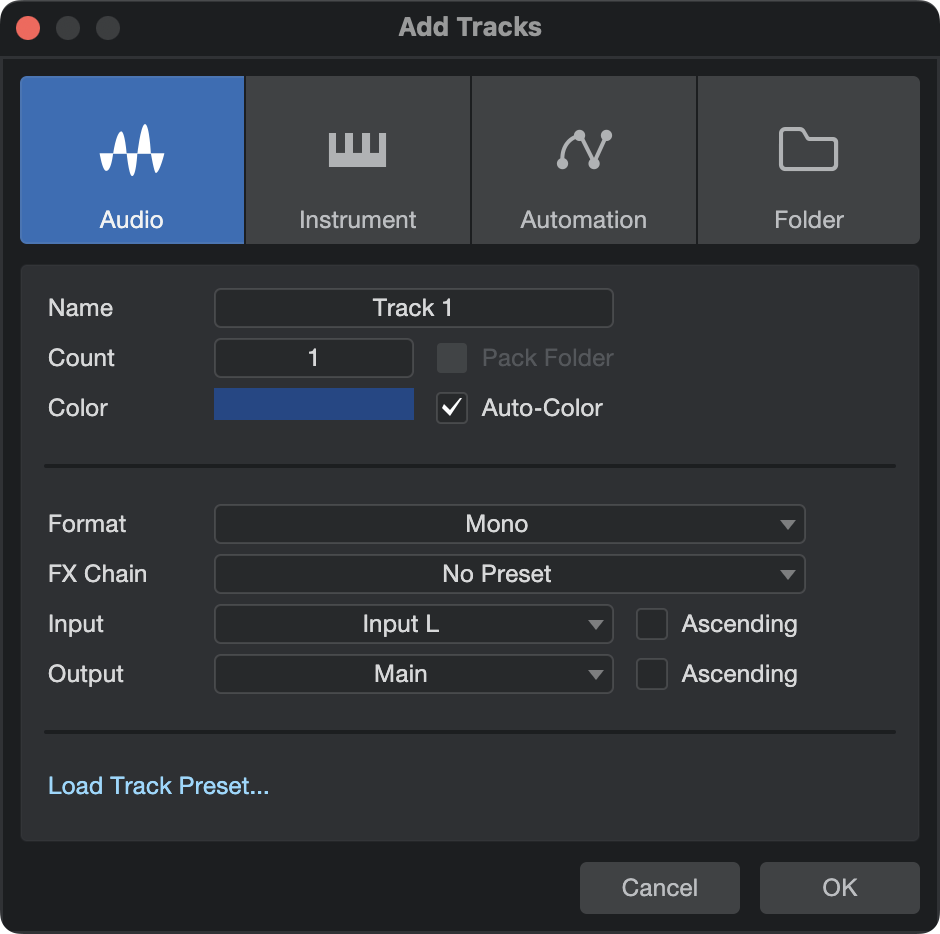
The following options are available in this menu:
- Name: Click here and type in a name for the new Track.
- Count: Choose the number of Tracks you would like to create.
- Type: Choose Audio.
- Color: Choose a color.
- Auto-Color: Check this box if you would like your Tracks auto-colored.
- Format: Choose mono, stereo, or one of many available surround formats. (For more on mixing in Spatial Audio, visit the Spatial Audio topic.)
- FX Chain: Choose an FX Chain to be pre-loaded on the Tracks.
- Input: Assign an audio Input to the new Track(s). When creating multiple Tracks, you can engage the Ascending option to assign Inputs to each Track in ascending order (Track 1, Input 1, Track 2, Input 2, etc.).
- Output: Assign an audio Output to the new Track(s). When creating multiple Tracks, you can engage the Ascending option to assign Outputs to each Track in ascending order (Track 1, Output 1, Track 2, Output 2, etc.).
- Load Track Preset… Choose from a list of your stored Track Presets. Track Presets
Once these options are configured, click on OK, and the Tracks appear in the Arrange view, below the currently selected Track.
Navigate to Track/Add Audio Track (mono or stereo) to quickly add an audio Track.
[Right]/[Ctrl]-click in blank space in the Track Column and select Add Tracks For All Inputs to quickly add a Track for every configured input in Audio I/O Setup.
Alternatively, you can [Right]/[Ctrl]-click in any blank space in the Track Column of the Arrange view and select Add Audio Track (Mono) or Add Audio Track (Stereo) to quickly add an audio Track.
To remove an Audio Track, select the desired Audio Track (with no Audio Events selected) and and press [Delete], or select the desired Instrument Track and press [Shift-T].
Use and Create Presets
In Studio One Pro, you can store presets of an entire chain of effects plug-ins as an FX Chain, allowing quick recall of complex effects setups on any Track. Any factory preset or user-created FX Chain can be selected as a Preset when creating a Track. For more information, refer to the FX Chains section of the Mixing chapter.
Configuring an Audio Track
This section describes the editable Audio Track parameters.
Input/Output Selection
An Audio Track’s I/O channel(s) can be selected from three places: the Track Column, the Console, and the Track Inspector.
To select an Input Channel from the Track Column:
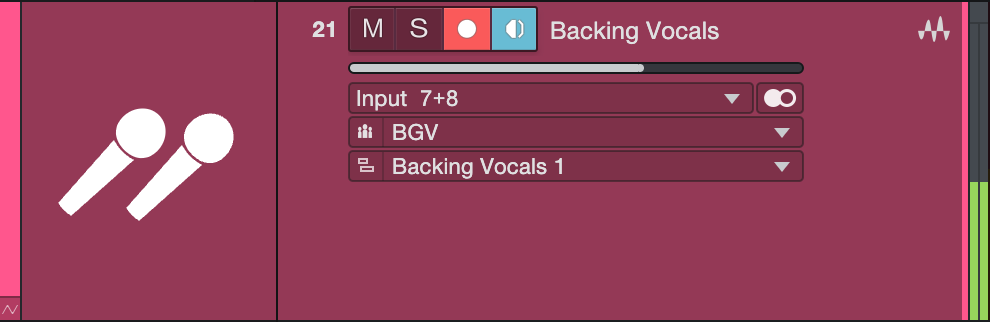
- If needed, expand the Track's control area to expose the input selector.
- Click the Input Selector immediately below the horizontal Track fader to choose from any configured Input Channel.
To select an Input or Output Channel from the Console:
- Open the Console by clicking the [Mix] button, or press [F3] on the keyboard.
- Click the selectors above each Track’s Fader and Pan controls to choose an Input and/or Output Channel. The Input Channel selector is on top, with the Output Channel selector beneath.
To Select an Input or Output Channel from the Inspector:
- Open the Inspector window by clicking on the [I] button above the Track Column or pressing [F4] on the keyboard.
- In the Channel area of the Inspector window, you can find the currently selected Track’s Channel Mode toggle (mono or stereo) and Input and Output Channel selectors.
- Click on the Input or Output Channel selector to choose a Channel.
Stereo Tracks can select from both mono and stereo Input Channels, while Mono Tracks can only select from mono Input Channels.
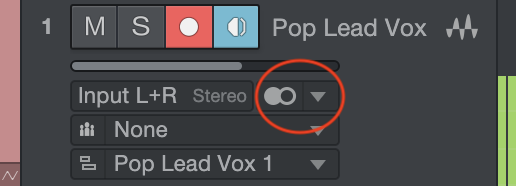
A Track’s Channel Format (mono or stereo) can be switched with a single click of the single-circle (mono) or double-circle (stereo) icon. You can toggle many Tracks’ Channel Format simultaneously by selecting multiple Tracks before clicking this icon.
Multichannel surround formats are available from the drop-down menu to the right of the Channel Format icon.
Tempo Mode
The Tempo mode, found in the Inspector, affects the way in which Audio Events are handled on any audio Track.
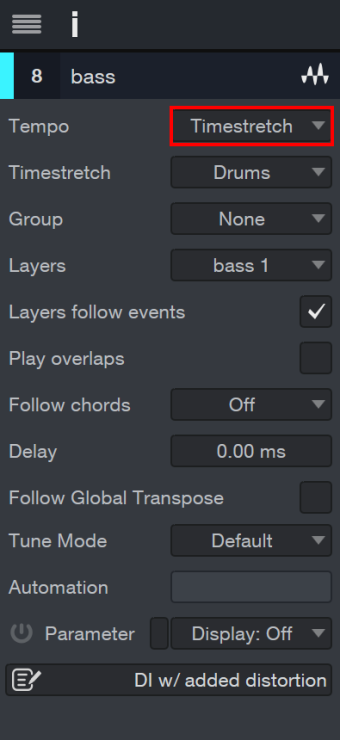
There are three Tempo modes:
- Don’t Follow: Audio Events on the selected Track are not affected by Song tempo.
- Follow: The start position of Audio Events on the selected Track is adjusted with tempo changes, so the Events stay in sync with their Bars (bars and beats) position. The length of the Event is not affected.
- Timestretch: Assuming that the Song file contains tempo information, tempo changes cause Audio Events on the selected Track to be dynamically stretched so that the Events’ start and end times stay in sync with their Bars (bars and beats) positions. The length and internal timing of the Event is affected in the stretching process but the pitch of the audio remains unaffected.
If the Stretch Audio Files to Tempo option is selected when creating a new Song, Timestretch is set as the default tempo mode for all new Audio Tracks.
Re-Recording
Instrument Output and Bus channels can be selected as the input to any stereo Audio Track. These Channels are grouped in branches in the input selection menu for the Audio Track.
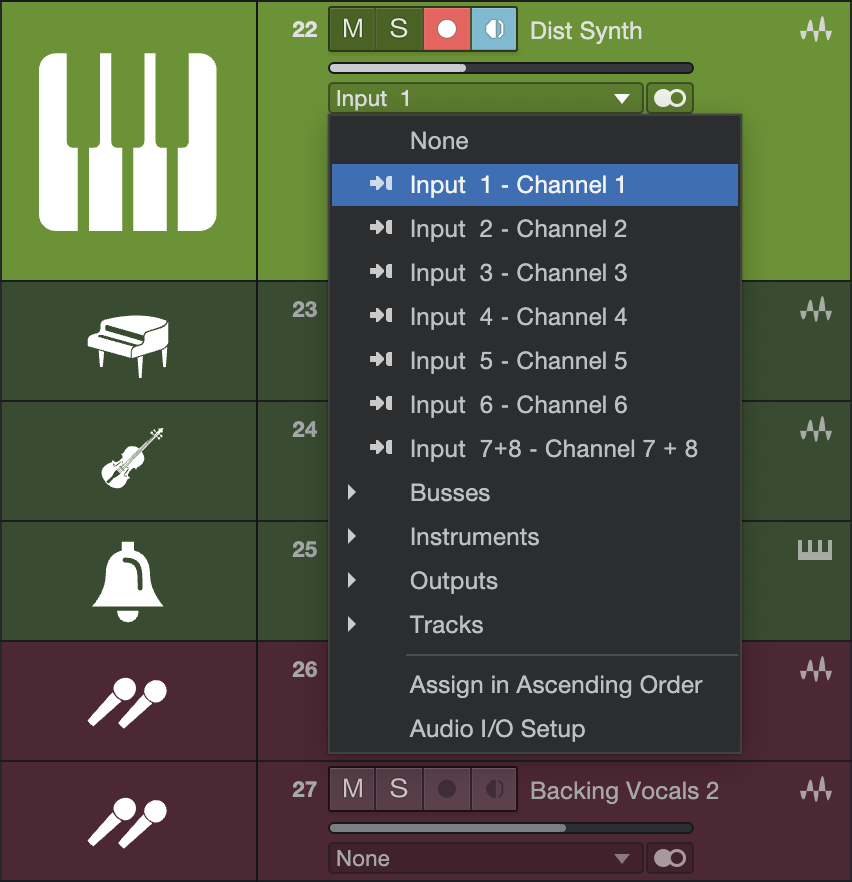
This is very useful in a number of situations in which you would like to “print” the live output of one of those Channel types (live virtual instrument recording to audio, hybrid analog mixing, etc.).
Record-Enabling an Audio Track
To record to an Audio Track, the Track must be record-enabled. To record-enable an Audio Track, click on the Track’s Record Enable button once or select the Track and press [R] on the keyboard. Select multiple Tracks and record-enable any of them to record-enable all selected Tracks. The Record Enable button turns red when active, and the Track’s meter begins to move up and down if there is live audio input on the Track’s selected Input Channel.
Alternatively, if you press and hold [Alt]/[Option] on the keyboard, and then click on Record Enable, you both record-enable the related Track and disarm record-enable for all other Tracks.
You can find the Audio Input Follows Selection in the Studio One/Options/Advanced/Console options list (macOS: Preferences/Advanced/Console). Engaging this automatically record-enables the last Track selected in the Arrange view. Monitor-enable is, by default, automatically engaged when Record Enable is engaged.
When an Audio Track is record-enabled, a clip indicator appears at the top of the input-level meter for that Track in the Arrange view. If clipping occurs at the input, the clip indicator turns on. When clipping occurs, you should adjust the input gain/level on your audio interface, as once the distorted signal is recorded, it cannot be fixed.
Once an Audio Track is record-enabled, you are ready to record. Refer to Activating Recording for more on this topic.
Software Monitoring
To monitor (listen to) live audio input on an Audio Track, click on the Monitor enable button once. This button should turn blue, and you should begin to hear your live audio input and see its input level on the Track meter. You can also hold [Alt]/[Option] on the keyboard and then click on the Monitor enable button to simultaneously engage monitoring on a Track and disengage monitoring on all other Tracks.
It may be helpful to picture the signal path to understand exactly what is happening. For example, if you are listening to a guitar plugged into channel 1 on your audio interface, then Studio One Pro receives the guitar input on Hardware Input 1.
In Audio I/O Setup, you will have created a mono Input Channel with Hardware Input 1 as its source. Your Audio Track has that Input Channel selected as its input. The Output of your Audio Track is likely to be the Main Output, which is a stereo Output Channel. The Output Channel sends to a designated stereo pair of outputs on your hardware audio interface, which presumably are connected to your monitor speakers or headphones.
When monitoring live audio input from a microphone, avoid listening with speakers that are in close proximity to the microphone. Otherwise, you might create a feedback loop that could quickly generate dangerously loud audio levels, possibly harming your ears and your speakers.
Hardware Monitoring
Some audio interfaces feature the ability to monitor the hardware inputs and outputs directly, as opposed to monitoring through software. This is referred to as “hardware monitoring” or “zero-latency monitoring.” When using this type of interface, we recommend that you monitor live audio input via the hardware, rather than through the software. This can help you to avoid common problems that result from software latency, such as hearing a delay when you record vocals, or recording off-beat.
Setting Input Levels
Setting good input levels is critical to making a good recording. This begins with the hardware audio interface. If the hardware’s input level is set too low, and you increase the level later in Studio One Pro to compensate, you also raise the level of any noise in the signal. If the level is too high, you can overload the hardware input, causing unpleasant clipping distortion that cannot be fixed. Therefore, you should set the input gain on your audio interface as high as possible without overloading the input. There is usually a clip indicator for each input on the audio interface to assist you in detecting overloads.
As long as the input levels are not clipping in your audio interface or on the Track to which you are recording in Studio One Pro, you can always adjust the levels of recorded material after the recording is made. To visually monitor the input levels for any input in Studio One Pro, it is best to view the Input Channels in the Console by clicking on the Inputs tab in the Console.
Disabling an Audio Track
When working in large Songs with high Audio and Instrument Track counts, it can be useful to disable certain Tracks that are not currently in use, to free up CPU and RAM resources for use elsewhere. Disabling an Audio Track disables and unloads any Insert effects used. To disable an Audio Track, [Right]/[Ctrl]-click the Track in Arrange view, and choose "Disable Track" from the pop-up menu. To re-enable a disabled Audio Track, [Right]/[Ctrl]-click the Track and choose "Enable Track" from the pop-up menu.