Effects Signal Routing
Effects processing is critical when mixing. Effects are traditionally applied to audio via an Insert or a Send.
Inserts
Inserts are used to apply an effect directly to a single Channel or Bus. Insert effects are literally inserted into the audio signal chain within the Channel or Bus.
Adding Inserts
The Insert Device Rack contains all Insert effects on a given Channel and is visible in the Console. To add an Insert effect to any Channel, drag-and-drop an effect from the Browser into the Insert Device Rack of a Channel in the Console or click-and-drag directly to a Track or Track Lane in the Arrange view.
When navigating audio effects in the Browser, some effects have a navigation arrow next to them. Click on this arrow to expose the presets for the effect. Click-and-drag a preset into the Insert Device Rack on any Channel to add the effect with the preset already loaded.
Alternatively, you can click on the Add Insert button at the top of the Insert Device Rack to add an Insert effect to a Channel from a pop-up menu. The plug-in menu functions like a smaller version of The Browser, giving you sorting options, and access to the Favorite and Recent Plug-ins lists. You can navigate this list using the [Arrow] keys on your keyboard. Click in the search bar and type to find plug-ins by name.
Alternatively you can choose to browse plug-ins from a basic menu. To change the plug-in menu style, go to the Console Advanced Options and select the Plug-in Menu style from the popup menu.
Editing Inserts
To edit an Insert, double-click on it in the Insert Device Rack, or click on the menu arrow (or [Right]/[Ctrl]-click anywhere on the Insert) and select Edit from the pop-up menu. This opens the user interface for the Insert effect, where you can edit the effect’s parameters.
When audio effects are inserted on the same Channel, all of the plug-ins appear in tabs at the top of the plug-in header GUI. This makes switching between effects in the same Insert Device Rack and signal path quick and easy.
The user interfaces for effects from third-party manufacturers vary drastically; for more information, please refer to the documentation for each effect. Studio One Pro’s built-in effects are discussed in depth in the Built-In Effects chapter.
Reordering Inserts
Inserts affect the audio signal path in the top-to-bottom sequential order in which they are inserted. An Insert can be reordered by clicking-and-dragging it above, below, or in between other Inserts. It is helpful to experiment with different signal paths to achieve the best possible sound or a particular effect. Note that Splitters are a special case, and cannot be re-ordered via drag and drop due to the parallel manner in which they process the signal chain.
Navigating Inserts
By default, only one window displays the user interface for an open Insert effect. This keeps screen clutter and window juggling to a minimum. To quickly switch between Insert effects on a single Channel, click on the chosen effect tab at the top of the plug-in header GUI.
Alternatively, press [F11] on the keyboard to open the effect editor for the selected Audio Track, then press [Ctrl]/[Cmd]+[Page Up]/[Page Down] to cycle through the effects in that Channel’s Device Rack.
Inserts can be also re-ordered by dragging them from one position to another in the list of Inserts at the top of the plug-in GUI.
The interface for any Insert can be made to stay open in an independent window until you choose to close it by clicking on the Pin button in the upper right of the Insert Effect window. With an Insert effect pinned, opening another Insert effect opens a new Insert Effect window. Any number of Insert Effect windows can be pinned and open simultaneously.
Copying Inserts to Other Channels
Copy One Insert to Another Channel
It is often helpful to be able to copy an Insert effect, including its current settings, to another Channel. To do this, click on the desired Insert effect in the Insert Device Rack and drag it directly onto any other Channel or into the Insert Device Rack on any other Channel. Dragging an Insert effect to the left or right edge of the viewable Console scrolls the Console left or right to expose any Channels beyond those currently viewable.
It is also possible to click on the Copy button in the plug-in header GUI, then switch to another instance of the same plug-in and click on Paste to copy settings from one instance to another.
Copy an Insert FX Chain to Another Channel
You can copy the entire set of Insert effects from one Channel to another, including their current settings. To do so, click the top of the Inserts Device Rack and drag it to the target Channel.
Moving Inserts to Other Channels
In the event that you want to move, rather than copy, an Insert to another Channel, hold [Alt] as you drag the Insert from one Channel to the other.
Add An Insert Effect to a Sends Device Rack
You can drag an Insert effect to any Sends Device Rack to create a new FX Channel with that effect inserted (its settings intact), and route that Send to the new FX Channel.
Compare
The [Compare] button in the plug-in header GUI allows you to compare the current settings for a plug-in to the settings stored the last time the Song

This makes it possible to freely compare potential changes for a plug-in to existing settings, while retaining a quick way back to existing settings.
Bypassing, Deactivating, and Disabling Inserts
It is possible to bypass, deactivate, or disable Insert devices. When an Insert is bypassed, the audio signal is simply rerouted around the Insert, and any CPU or RAM the Insert is using remains in use. When an Insert is deactivated, it is turned completely off, which can free up CPU resources, but the process remains in RAM, enabling you to instantly turn the plug-in on/off for comparison purposes. When an Insert is disabled, both CPU and RAM loads are relieved, however, this process is not as instant as bypassing or deactivating an insert. While Insert bypassing is automatable, deactivation and disabling are not.
To bypass an Insert effect, click on the Bypass button found either in the top left of the effect’s GUI header or within the effect GUI, depending on the effect.
To deactivate an Insert effect, click on the Activate button for the Insert effect in the Insert Device Rack. There is also an Activate button at the top left of every Insert Effect window. Deactivating an Insert effect stops all processing related to it, which frees the computer processing resources previously dedicated to that Insert effect.
To deactivate or activate all Insert effects in any Insert Device Rack, click on the Activate All button at the top of the Insert Device Rack.
To disable an Insert effect, [Right]/[Ctrl]-click it in the Inserts list, and choose Disable from the context menu. Once an Insert is disabled, it cannot be activated unless it is re-enabled. To do this, [Right]/[Ctrl]-click the Insert and choose Enable from the context menu.
Activating Inserts Across Multiple Channels
If two or more Channels are selected, pressing the Activate button for any Insert on a selected channel also toggles the activation state of the Inserts in that same slot on the other selected Channels. Pressing the Activate All button at the top of the Insert list for a selected Channel makes all other selected Channels follow suit, activating or deactivating their Inserts, as appropriate.
Toggle all Active Inserts Off/On

If you wish to temporarily deactivate all Inserts across all Channels in your song, press the Activate All Inserts button at the bottom-left of the Arrange view. Press the button again to return all Inserts to their most recent activation state—inserts that were deactivated before clicking Activate All Inserts will remain deactivated. Hold any modifier key (Shift, Alt/Opt, or Cmd/Ctrl) while clicking Activate All Inserts to activate these Inserts alongside the rest. In this way, you can instantly compare the sound of your Song with and without all activated Insert effects. In addition, any Insert effects or Instruments can be deactivated from the expanded Performance Monitor window using the check-box next to the Plug-in name.
Removing Inserts
To remove an Insert effect from the Insert Device Rack, do one of the following:
- Click on the menu arrow for the Insert effect in the Insert Device Rack (or [Right]/[Ctrl]-click anywhere on the device) and select Remove from the pop-up menu.
- Click on the Insert effect in the Insert Device Rack and drag it into the Trash Bin panel of the Console.
All Inserts can be simultaneously removed from an Insert Device Rack by clicking on the menu arrow at the top of the Rack and selecting Remove All. When any Insert effect is removed, it is placed in the Trash Bin, where it can be restored to its original state and location at any time.
Mix Engine FX
Mix Engine FX is a plug-in format for Studio One Pro, specializing in processing tasks that affect multiple channels in a song (such as console emulation). In the case of console emulation, most systems require you to insert a special "channel" plug-in on each channel in the song, and a "bus" plug-in across any busses. This increases the time it takes to set up a new song, and makes managing the process complex, as any changes desired for the whole mix often must be carried out across multiple channel and bus plug-ins.
Mix Engine FX centralizes this and other similar processes. You simply drop a compatible plug-in onto the Mix Engine FX slot on the Master Bus, or any other bus you wish to affect. All Channels that feed that Bus are affected by the Mix Engine FX plug-in at their source (taking the place of the "channel" plug-in), and all parameters are controlled from the one central plug-in interface (which takes the place of the "bus" plug-in).
Unlike most solutions that rely on multiple plug-ins working together, Mix Engine FX can be bypassed with just a click, allowing for easy A/B testing between dry and processed signals across the whole mix. Another advantage to this method is inter-channel processing. Because Mix Engine FX are "aware" of all channels flowing into them, effects like inter-channel console-style crosstalk are made possible.
Each Bus can have one Mix Engine FX plug-in inserted at a time.
For more information on Mix Engine FX, see Mix Engine FX.
Hardware Inserts
You can insert external hardware processors into Audio Channels in the Console, using the Pipeline XTplug-in. The Pipeline XT plug-in can be found in the PreSonus folder of the Effects Browser when sorted by Folder, Vendor, or Category.
The Pipeline XT plug-in routes audio to a hardware processor and then back from that processor through specific inputs and outputs on your audio interface, while automatically compensating for the round-trip latency incurred in the process. You can insert an instance of Pipeline XT in any Insert Device Rack.
To learn more about Pipeline, refer to the Pipeline section of this manual.
Channel Editor and Macro Controls
Each Channel in the Console has a special set of effects-related options and controls called the Channel Editor. With it, you can create complex combinations of insert effects, controlled by easy-to-access Macro Controls. For more information see Channel Editor.
Configuring Sends
Sends are used to route the audio output (pre- or post-fader) from one Channel to another, such as an FX Channel.
Creating a Send to an FX Channel
To simultaneously create a new FX Channel and create a Send to that FX Channel from an existing Channel, click-and-drag an effect from the Browser into the Send Device Rack on a Channel. This creates a Send for the Channel to a new FX Channel with the selected effect loaded in its Insert Device Rack. This also works with FX Chains.
You can press [F11] to quickly open the FX view for the currently selected Channel, or press [Shift]+[F11] to open the Instrument window of a selected Instrument Track.
You can also drag an audio effect into a blank space in the Console to create an FX Channel with that effect loaded into its Insert Device Rack. To route audio from a Channel to an existing FX Channel, click on the Add Send button in the Send Device Rack and choose the FX Channel from the list.
Dragging an audio effect or FX Chain to the Send slot of a Track lets you create a new FX Channel with the same name as the plug-in or FX Chain.
You can also create a Send on an FX Channel to route the affected signal to any other Audio, Instrument, Bus, or even another FX Channel.
Alternatively, you can create an FX Channel by [Right]/[Ctrl]-clicking in blank space in the Console, or on any Channel, and selecting Add FX. This adds an FX Channel to the Console with no Inserts, which can be the destination for any Send.
FX Channels are routed to the Main Out Channel of the Console by default, but can be routed to any other configured hardware outputs or Bus Channels, as needed.
To quickly view the effects in the Insert Device Rack of a Send’s destination Channel, double-click on the Send. You can then navigate the Insert Effect menu as usual.
Send Level and Pre/Post Fader
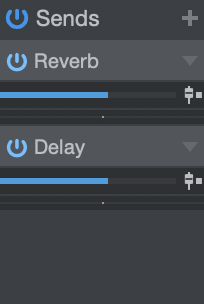
Once a Send has been added to a Channel, the Send device appears in the Send Device Rack for that Channel. An Activate button, horizontal Level and Pan faders, and a Pre/Post Fader button are available. Click on the Activate button to activate/deactivate the Send; this does not affect the Send's destination Channel.
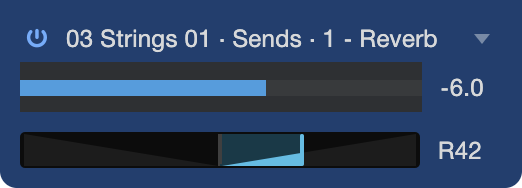
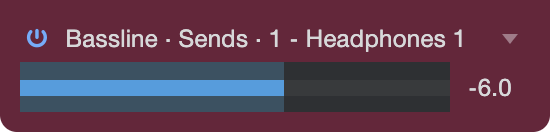
Double-clicking the Send device will bring up a larger pop-up interface for fine Send level and pan adjustments.
These pop-ups display The Cue Mixes for the currently-selected channel. With the left/right/up/down arrow keys you can navigate to the Cue Mixes, Sends, and Panning of other channels across the Console..
Click-and-drag on the horizontal Level fader to adjust the send level between -∞ and +10 dB. Click-and-drag on the Pan fader to adjust the balance of the source material going to the send destination. Click on the Pre/Post Fader button to switch the send source to pre-fader or post-fader. Pre-fader allows you to set a send level independent of the channel fader so that the level is unaffected by fader position.
The send source signal is always post-inserts.
Double-clicking the Send interface will present a larger pop-up interface suitable for fine adjustments.
Channel Pan Lock
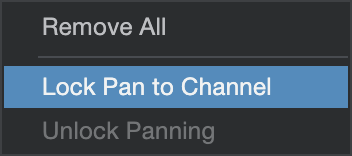
By default, a Send’s pan setting in a Bus send, Cue mix send, or FX Send is tied to that of its Channel. Use the Sends drop-down menu (in either the micro view or the pop-up) to access the option to Unlock Pan for a Channel’s entire send rack, or use the drop-down menu on each send to assign Pan Lock on a per-send basis. Disabling Pan Lock on either will unhide the panning interface directly below the Send Level interface.
Note that if a Send is unlocked from a Channel’s panning, all newly-created sends will also be unlocked. This default setting will also carry over to new Documents.
Sidechaining
Certain virtual instruments and effects can accept an input from an audio source that dynamically changes the behavior of the instrument or effect. This is called “sidechaining,” and it facilitates processes such as keying, ducking, and de-essing. Sidechaining is accomplished by using a Send to route audio to a special Sidechain input on an Insert on an effect or instrument.
An example of sidechaining is when a gate is triggered by a specific audio signal. In this case, the gate opens and closes dynamically in response to the audio signal coming in the sidechain, rather than responding to the program signal on the Channel where the gate is inserted. Several of Studio One Pro’s built-in effects support sidechaining, including the Compressor and Gate. For more information, refer to the Built-In Effects chapter.
It is possible to send to the Sidechain input of any insert effect, whether or not the sidechain is engaged in the effect.
The sidechain connection can be assigned inside the target instrument or insert effect. Click on the arrow button next to the Sidechain activation button, then select one or more channels from the popup menu. For the sidechain to work in an effect or instrument, it must be engaged.
Sidechain-compatible instruments and effects will contain a sidechain menu item. Click the Sidechain button to enable or disable the Sidechain. The drop-down menu to the right of the Sidechain button allows you to configure the routing to the selected plug-in(s).
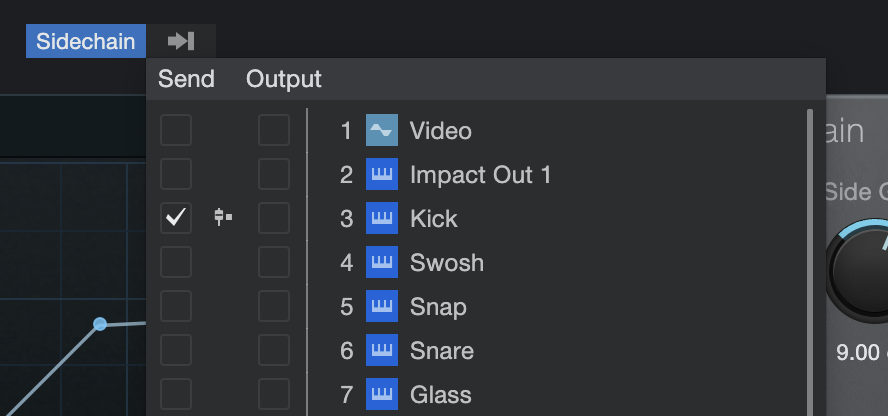
- Tick the Send tickbox to use a Send from the desired Channel to the Sidechain. (If no Send exists, a new one will be created.)
- Click the pre-/post-fader icon in the middle to toggle between a pre-and post-fader Send to the Sidechain. (This option is only available when using a send.)
- Tick the Output tickbox to instead route the desired Channel Output(s) to the Sidechain.
Right-clicking in the routing menu when using a Send will bring up a contextual menu:
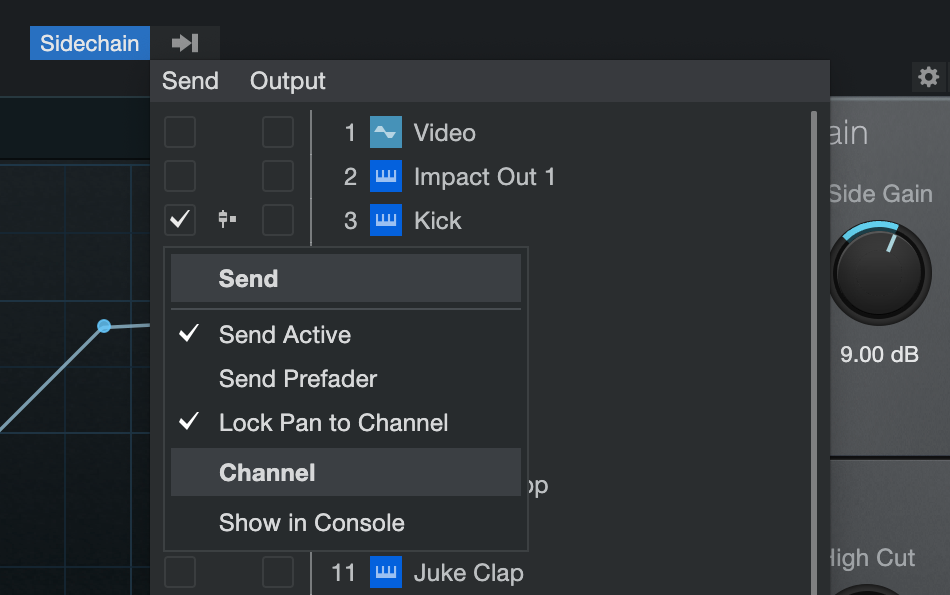
- Send Active: Enables or disables the Send.
- Send Prefader: Toggles the pre-/post-fader configuration (same as clicking the icon.)
- Lock Pan to Channel: Toggles lock state of the Send pan value to the Channel’s pan value.
- Show in Console: Selects to the Send/Output Channel in the Console.
Sending Signals to Busses
It is possible to use a Send to route audio to a Bus Channel. This is done in the same manner that a Send is used to route audio to an FX Channel, except that the Bus Channel is selected. This can be used, among other things, for “multing”—routing a Channel to multiple places—which is a convenient way to layer sounds.
Copy One Send to Another Channel
Sends can be copied from Channel to Channel in the same way as Inserts. To do this, click-and-drag a Send from one Send Device Rack to another one. This creates a Send to the same FX Channel assigned to the original Track.
Copy a Send Chain to Another Channel
You can copy an entire set of effects from the Sends of one Channel to another, including the current settings. To do so, click the top of the Sends Device Rack and drag it to the target Channel.
Moving a Send Effect to Another Channel
In the event that you want to move, rather than copy, a Send effect to another Channel, hold [Alt] as you drag the effect from one Channel to the other.
The FX and Solo Safe
FX Channels have Solo Safe engaged by default, because effects may be critical to how soloed Channels sound in the mix. So when any Channel in the Console is soloed, the FX Channels remain active.
The Solo button is green when Solo Safe is engaged.
Navigating Effects Presets
To view the available presets for an effect, click on the preset selector in the plug-in editing window, and browse the pop-up list. To select a preset, click once on the preset in the list. The presets list remains open, to allow for easier switching between presets while auditioning. To close the list, click anywhere other than the preset list. To select a preset and close the list in one action, double-click the preset of your choice.
Once the preset list is open, you can navigate through the presets with the arrow keys. To activate a preset and leave the list open, press [Space]. To activate a preset and close the list, press [Return].
Creating and Managing Effects Presets
In the upper left area of every plug-in editing window, you'll see the Preset Menu button, which lets you create, load, and import & export presets. Click the Preset Menu button to choose from the following preset management functions:
- Store Preset...: Saves the current effects setting as a preset, in your library in the Browser. You can enter a title and description for the preset, as well as specify a subfolder within the preset list to store the preset.
- Replace Preset: Update the currently loaded preset with any new settings made since loading the preset.
- Store as Default Preset: Causes the current preset to load by default whenever a new instance of the current plug-in is added to a Song.
- Load Preset File...: Loads an exported preset file from your file system into your current Song.
- Import Preset...: Loads an exported preset file from your file system into the current Song, and imports the preset into your Studio One Pro library, for later use.
- Export Preset...: Exports the current settings as a preset file, for use by others or for storage.
- Show in Browser: Locates the currently loaded preset in the Browser.
You can also store any effect or Instrument preset by dragging-and-dropping the Insert effect or Instrument from the Console to the Browser. If dragged to a location in the File Browser, the preset is stored in that location. If dragged to the Effects or Instruments Browser, the preset is stored in your User Data location (as set in the Studio One Pro/Options/Locations menu (macOS: Preferences/Locations) and becomes available in the preset dropdown lists of the Browser and effect or Instrument.
FX Chains
Sometimes, a favorite combination of effects can become a staple of your workflow. For instance, you might regularly apply a compressor, EQ, and chorus to your vocal tracks. FX Chains let you save the exact setup of the Inserts on a Channel, so that the entire chain of effects, including all settings, can be recalled instantly for later re-use.
To create an FX Chain:
- Configure a Channel with the desired Insert effects and settings.
- Click on the menu arrow at the top of the Insert Device Rack, next to the Insert label, and select Store FX Chain from the pop-up menu.
- Type in a unique name for the FX Chain and click OK or press [Enter] on the keyboard.
Alternatively, you can drag and drop the Insert Device Rack header to the Effects Browser to instantly create an FX Chain with the name of the Channel. You can also drag and drop the Insert Device Rack header to the File Browser, to export an FX Chain as a file, with the name of the Channel. To replicate all Devices currently assigned to a Track on another Track, drag and drop the Insert Device Rack header from the source Track to the Track of your choice.
FX Chains incorporate any parallel processing you set up in the Routing view of the Channel Editor window. Complex multi-effects configurations with custom Macro Controls can be stored and recalled with ease.
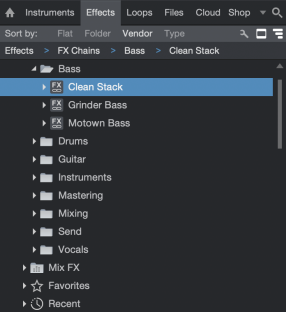
FX Chains can be found in the FX Chains folder in the Audio Effects Browser. To insert the FX Chain in the Insert Device Rack of a Channel, drag any FX Chain from the Browser to the Channel. To replace an effect in the Device Rack, drag the FX Chain on top of the device to be replaced. Drag the FX chain between plug-ins or to an open spot in the Device Rack to insert it without affecting existing device assignments.
Click on the menu arrow next to the FX Chain name in the Audio Effects Browser to view and select the individual effects. Both the individual effects and each preset can be dragged to the Insert Device Rack of any Channel.
It is also possible to access FX Chains from the Insert Device Rack by clicking on the menu arrow at the top of the Rack and selecting an FX Chain from the list. This loads the selected FX Chain in the Insert Device Rack.
Busing
Buses can be extremely useful when mixing. You can route Channels directly to buses to help organize a mix into common elements, such as routing all Drum Tracks directly to a drum bus. Sends are often used to route a channel to multiple buses in order to layer a signal into various elements of a mix.
To create a new Bus, [Right]/[Ctrl]-click in blank space in the Console, or on any channel, and select the “Add Bus” option from the context menu. You can also select any number of Channels, then [Right]/[Ctrl]-click on one of the selected Channels and choose the “Add Bus for Selected Channels” option to quickly create a new Bus and route the selected Channels to that new Bus.
Once you have a Bus with Tracks assigned to it, you can [Right]/[Ctrl]-click the Bus and choose “Hide Sources” to hide all Tracks assigned to that Bus in the Console. [Right]/[Ctrl]-click the Bus again and choose “Show Sources” to make source Tracks visible again.
You can then choose that Bus as the Output or Send destination for any Audio or Instrument Channel in the Console. The Bus sends its summed signal to the Main Out by default but can also be routed to Sub Out Channels. Buses have Sends that can be used the same way as other Sends in Studio One Pro.
It is possible to nest buses infinitely (A to B, B to C, C to D, and so on). Feedback prevention is in place so that you can’t create a bus routing that would cause a feedback loop (e.g., A to B, B to C, C to A).
To remove a Bus and re-route all source Tracks to the Main Out, [Right]/[Ctrl]-click the Bus and choose "Remove".
Transforming Buses to Rendered Audio
You can also render an entire Bus structure to one audio track/channel. To do so, choose the “Transform to Rendered Audio” option from the Bus context menu. If desired, you can transform multiple bus channels at once by selecting the desired busses before selecting the Transform to Rendered Audio option.
![]()
This option could be helpful if you would like to consolidate multiple bus channels for either organizational purpose or consolidated editing. When transforming a Bus to rendered audio, the Inserts of the Bus are also rendered and Bus Send assignments are restored on the new Audio Channel. Of course, this can be considered an added benefit, as rendering the bus inserts reduces the CPU load of your Studio One Pro Song.
Transforming Buses linked to VCAs is possible as long as the VCA has no automation data. If automation data is on the VCA automation track, a message that the untransformed VCA has a send to the transformed bus will be shown. If VCA automation data is intended to be used, use the “Merge VCA automation” function before transforming the bus channel.
Note: The export format (stereo, mono, etc.) is defined by the previous bus format.
After the bus is transformed, a “Rendered Audio” icon will appear on your track and channel. Additionally, an edit lock will be placed on the rendered audio:

To remove the edit lock, simply right click onto the track and select the “Unlock Track” option from the context menu.
To transform the track back to realtime processing, choose the “Transform to Bus Channel” option from the track’s context menu. After doing so, the Audio Track is removed, Bus and all subordinate Tracks are restored, and changes on send assignments are applied to the restored Bus channel. Please note that edits made on the rendered Bus Tracks will be lost after transforming back to the realtime processing. Also, Mix FX are not reinstated to the audio track after retransforming a bus to realtime audio.
Note: The “Transform to Rendered Audio” option is only available if subordinate channels do not have Send targets outside of the bus and are not targeted by sources outside of the bus.
For information about transforming tracks, please see Track Transform.
Remapping Effect Channels in Spatial Audio
Any effect can be used in the surround audio format. For any plug-in with mono, stereo and surround options, the available processing channels can be individually mapped to outputs or muted.
For more information about Remapping Effect Channels in Spatial Audio, check out Mixing in Spatial Audio.