Events
All audio and note data that exists within the timeline of your Song are visually represented by Events. Events that contain audio are called Audio Events and can only be located on Audio Tracks. Audio Events are distinct in that they display audio waveforms. Audio Parts are Events that contain multiple Audio Events.

Events that contain note data are called Instrument Parts and can only be located on Instrument Tracks. Instrument Parts are distinct in that they display musical performance information.

Audio Events and Instrument Parts are referred to collectively as Events in this manual. Event editing can take place both in the Arrange view and the Edit view. Audio Events and Instrument Parts can be edited in similar ways, but each has special considerations.
[Right]/[Ctrl]-clicking on any Event displays the Event contextual menu, which contains all related Editing actions, logically grouped. At the top of the contextual menu, you can find the Event Name, which can be edited by double-clicking on it and entering a new name. You can rename all Events on a Track by renaming the Track and holding [Shift] while pressing [Enter] after typing in the new name. You can also change the Event color by clicking on the color bar next to its name and selecting a color or scrolling through the colors with the mouse wheel.
Common editing actions are listed under the Event name, as well as a Recent Items list that contains the five most-recently used actions. In this way, you have instant access to the editing actions you most likely want to use.
Note that the available actions listed in the Event contextual menu depend on whether you are working with an Audio Event or an Instrument Part, and the actions may vary slightly depending on your version of Studio One Pro.
Tool and Event Snapping
Snapping allows editing actions to occur only at specified divisions in time (such as bars and beats), making editing easier when working with tempo-specific material. For instance, Snapping makes it possible to rearrange specific beats from a bar of a drum loop while keeping the rest of the loop in time. Snap is engaged by default and can be disengaged by clicking on the Snap to Grid button. You can also temporarily defeat Snapping by pressing the [Shift] key while moving the mouse.
If Snap is engaged, the current Snap setting affects the behavior of tools and Event editing by snapping the tool or Event to nearby time values, as follows:
- Adaptive: The default setting, where snapping occurs at the nearest logical subdivision of the current Timebase, based on the current timeline zoom level.
- Bar: Snapping occurs at the nearest musical bar line.
- Quantize: Snapping occurs at the nearest musical subdivision of the current Quantize Setting.
- Frames: Snapping occurs at the nearest frame subdivision.
There are six optional behaviors that can be selected and applied to any of the four modes above:
- Snap to Cursor and Loop: This option enables snapping to the playback cursor and Loop locators.
- Snap to Events: This option enables snapping relative to Events in the Arrangement.
- Snap to Zero Crossings: This option ensures that the audio data in an Event will snap to a zero crossing point. This will help avoid an unnatural click at the beginning of the audio data when the Event is moved or split.
- Snap to Grid: This option is engaged by default, allowing tool and Event snapping to the grid.
- Snap Event End: This option enables snapping on both the start and end of the moved Event. (When disabled, only the event start snaps.)
- Relative Grid: This option maintains the time relationship relative to the grid for any Event, so that when the Event is moved, the snap position maintains the original position relative to the grid, instead of snapping directly to the grid.

Spot
The Spot command, found in the right-click contextual menu of Events and Parts, allows you to precisely relocate Events and Parts via numeric entry. While Studio One Pro prides itself on drag-and-drop, there are times when this level of control and precision are advantageous; particularly when syncing audio events to video.
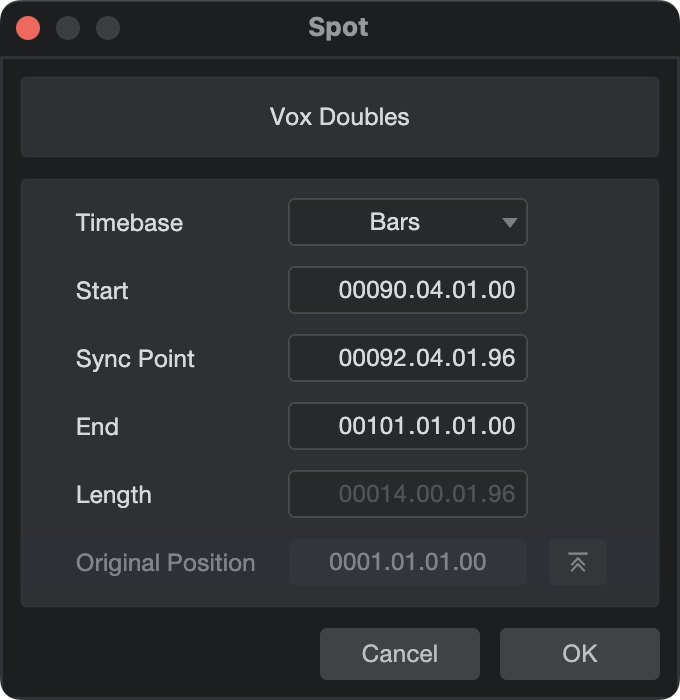
The timebase for a Spot operation is selectable from Samples, Seconds, Bars, or Frames, regardless of the Timebase configuration of your Song. Click on any numerical field in the Start, Sync Point, or End fields to enter values by hand, or click-and-drag on the numerical fields to edit with the mouse.
Spot works on Instrument Parts, Pattern Parts, and Audio Events. When applying Spot to several Parts or Events at once, note that their positional relationship to one another will be maintained. If adjusting the Start point, the start point of the earliest-beginning Event will be used. If adjusting the End point, the end point of the latest-ending Event will be used.
Imported files that contain timestamp information can be restored to their original position by clicking the icon to the right of the “Original Position” field.
You can also apply a Spot command on import when dragging to the Arrangement window and holding [Opt+Shift] on Mac or [Alt-Shift] on Windows.
Detect Tempo and Extract to Tempo Track
There are also several tempo mapping options available in the context menu of Audio Events. To access the other options, [Right]/[Ctrl]-click onto the Audio Events after dragging it onto the arranger.
From the Audio context menu, select “Detect Tempo." This action analyzes the file and aligns the timing of the original Audio Event to the song tempo, as long as time stretching is enabled in the Track Inspector. Once complete, a marker is placed on the first detected downbeat. The marker that is placed on the first downbeat is the sync point of the event, so moving the event will snap the first downbeat to the grid settings.
The “Extract to Tempo Track” applies variation to the song tempo map, so the song will follow the timing variations of your original audio event. This option can prove helpful if you’d like to retain the “feel” of a drum take while also conforming to the song’s set tempo.
Stretching Parts
Any Instrument Part or Audio Event can be stretched to fit a desired space in the Arranger.
Instrument Parts
Hold ALT while clicking and dragging from the left or right edge of an Instrument Part to stretch the Part. Note that any Automation points within the Part will also be stretched in kind. This can be disabled by de-selecting “Select Part Automation with Notes”  in the Note Editor toolbar.
Audio Events
Hold ALT while clicking and dragging from the left or right edge of an Audio Event to stretch the event. Stretching of Audio Events is more complex than Instrument Parts, and is covered in greater detail in Timestretching.
Sync Points
A Sync Point is a marker within an Audio, Video, or Instrument Event (including Patterns) used as a reference position for Studio One Pro’s Snap functionality. Ordinarily, Events will snap to position based on the start or endpoints of the Events themselves. Sync Points allow you to set this Snap position wherever you would like in an Event rather than relying on its endpoints.
This is useful for some Audio Events that may benefit from being snapped to a peak or transient that is not located at an event endpoint. Examples could include percussion loops with a transient in the middle of the loop; EDM riser samples that need to be snapped near their endpoint but not precisely at it; etc.
Sync Points’ snap behavior is determined by the option chosen in the Snap drop-down menu in the Toolbar (Bar, Quantize, Relative Grid, etc.).
Sync Points can also be used to snap two Events to each other using their Sync Points; "Snap To Events" must to be enabled in the Snap options.
Sync Points are non-destructive and flexible, meaning a Sync Point’s position is maintained if an Event is Reversed or Bounced!
Adding and moving a Sync Point
To add a Sync Point to an Event:
-
Choose the desired Event.
-
Click the timeline to position the cursor (playback head) where you would like the Sync Point to be placed. Zoom in for precision placement if necessary.
-
Right-click the desired Event and choose Events >> Set Sync Point to Cursor.
-
The Sync Point will be placed at the cursor position, visible as a white vertical line. A small yellow diamond appears on mouseover.

To move a Sync Point, click and drag the small yellow diamond icon to the desired sync position within the Event. When zoomed out, Sync Points will automatically snap to transients when moving. Zoom in to bypass this behavior. This behavior can be bypassed by disabling Snap [N], or by holding shift while moving the Sync Point.
Use the “Toggle Sync Point” command to disable/enable Sync Points on the currently-selected Event.
Sync Points also influence the behavior of the “Cursor Follows Edit Position” option. The cursor will snap to the Sync Point of an Event rather than its start point.
Event Icons
There are various Event Icons that you will likely encounter while using Studio One Pro, and in some cases, the icons can serve multiple functions. These icons appear at the bottom left corner of Events.
The following section describes what each icon represents.
Gear Wheel Icon
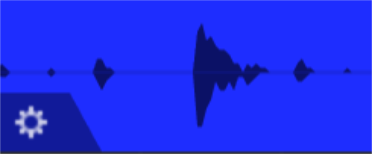
When the Gear Wheel Icon appears, this can mean one of three things:
-
Time stretching has been enabled.
-
The clip has a different sample rate than the rate your song is set to.
-
You have changed the transpose or tune value of the clip.
If you would like to ensure the clip is set at the same sample rate as your song, follow these steps:
-
To check the song’s sample rate, navigate to Song/Song Setup or press [Ctrl]/[Cmd]+[.] on the keyboard to open the Song Setup window.
-
Within the Song Setup window, confirm the song’s sample rate.
-
To check the Event’s sample rate, [Right]/[Ctrl]-click onto your Event, and from the drop-down menu, click onto the “Select in Pool” option.
-
The clip details will be displayed at the bottom of the Pool page.
-
If the sample rates are different, you can edit the sample rate of the clip from here to match the sample rate of the song. [Right]/[Ctrl]-click onto the clip and choose the “Convert Files” option from the drop-down menu.
-
From this window, you can easily edit the chosen clip’s file format, resolution, and sample rate.
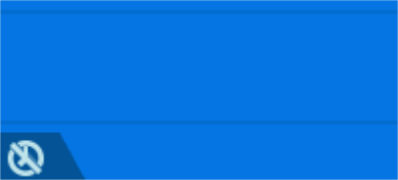
Mute Icon

The Mute Icon simply indicates when an Event has been muted. To toggle the mute function, you can either use the mute tool in the tool bar or use the key commands [M] to mute or [shift]+[M] to unmute.
Time Lock and Edit Lock Icons
The Time Lock icon appears on an Event when the Time Lock feature has been enabled. Time Lock keeps the Event from being moved to a different time position within the Track.
Similarly, the Edit Lock icon appears when the Edit Lock feature has been enabled. Edit Lock prevents the contents of the Event from being altered in any way. To toggle the Time or Edit Locks, [Right]/[Ctrl]-click onto the Event you would like to lock and click onto the Time Lock or Edit Lock checkboxes from the Event contextual menu.
When you use both features at the same time, a padlock icon will appear on the Event:

For more information about the Time or Edit Lock feature, check out the Lock Tracks or Events page.
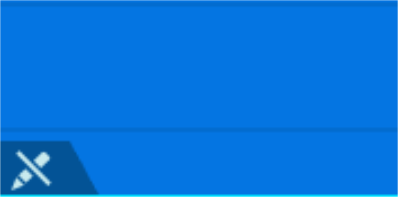
Event FX Icon

In Studio One Pro, you can apply an effect on a single Event rather than the entire track. To do this, you can simply drag an effect from the Browser section, hold down [Alt]/[Option], and drop it onto the chosen Event.
Note that when you are working with ARA (Audio Random Access) effects, like Melodyne or VocAlign, the same icon will appear, as they are essentially Event effects. Adding a second ARA to an Event will replace the previous effect with the second.
For more information about applying effects to individual Events, check out the Track and Event Inspectors page.
Chain Icon

The Chain Icon represents Audio Events that have been consolidated into a nestled unit. To merge Events, select the Audio Events that you would like to consolidate and click the key command [G].
Ghost Icon

When you duplicate merged Events, the Ghost Icon appears next to the Chain Icon. Duplication not only creates an identical Event. Any changes made to the original merged Event will also be made to the duplicated Events. In this way, you can easily modify duplicated snare hits or guitar parts placed throughout your song at once.
To duplicate your merged Event, [Right]/[Ctrl]-click onto the Event you would like to duplicate and click onto the “Duplicate Shared” option from the Event contextual menu or use the key command [Shift]+[D].
Folder Icon

When you see the Folder Icon on an Event, that means it belongs to a folder with other Events. Creating Folders can be helpful when you would like to group similar Events together, like drums or vocal harmonies. Placing these Events into folders can make the Arranger Window much easier to navigate.
To create a Folder, select the tracks you would like to place into one folder, [Right]/[Ctrl]-click, and select the option “Pack Folder” from the drop-down menu.
Layer Icon
![]()
This icon will appear on your Event if you have recorded several layers (or “takes”) of the Event. Alternatively, this icon can mean you have several pattern variations to choose from.
If you have various takes to choose from and would like to expand the Event to see all of the takes, [Right]/[Ctrl]-click, select the option “Unpack Takes” from the drop-down menu, and choose to unpack the takes to tracks, new layers, or to existing layers. For more information about recording and editing takes, check out the Comping page.
If you’ve created several variations of a drum pattern, you change the variation from the pattern editor or click onto the Layer/Pattern Icon and click onto the variation you wish. For more information about creating patterns and pattern sequencing in Studio One Pro, check out the Patterns page.